Welcome to January’s new blog posts with StillDragon! We hope that you all were able to enjoy the holidays with family and friends! What we are going to be talking about today is a lot, so buckle up. We’ll be going through what exactly is a double dragon and what the one main difference is between it and a single pot still. There’s literally only one huge difference, the reason why huge is being incorporated is because it will be a major benefit for most customers’ space. Does StillDragon only make them? Well…maybe? You’ll just have to skip down to find out! Why is our DoubleDragon the best? If you are not a repeat customer yet it can be scary to put in so much money for a piece of equipment that will make or break your distillery. We’ll go over why we are the best. And lastly the major benefits of using a DoubleDragon. There are many great benefits of having this beautiful piece of equipment working in your distillery.
What is a Double Dragon Still? How is it Different From a Single Pot Still?
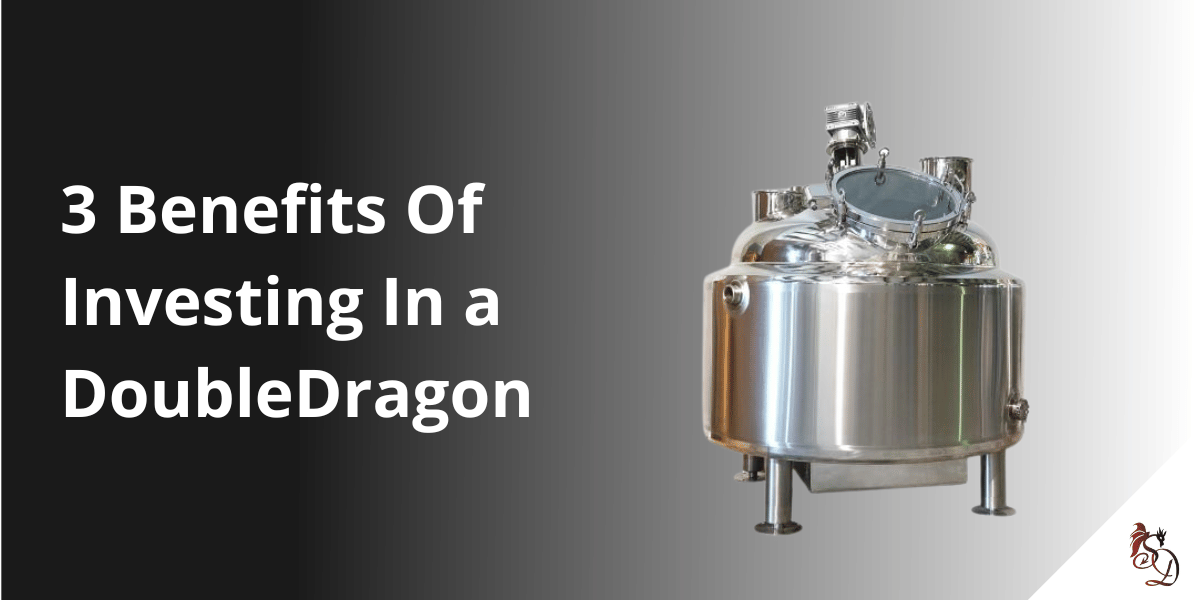
In the images, you can see that the StillDragon DoubleDragon looks a bit different compared to regular ol’ still. There’s a second column connection at the top of the kettle, and both connections are off-centered to allow for 2 columns on top of the kettle. Our Pot Belly Kettles on the other hand, only have one column connection for your helmet, stripping column, gin basket, or vodka column. Typically, that one pot still is only designated for one of those duties, requiring either multiple kettles for the different types of spirits, or added labor costs to change the column for the type of spirit. With a DoubleDragon, you can generally change the type of distilling with the twist of a valve.
Where did the design come from?
The reason behind it being named a DoubleDragon is because we actually invented it! In an effort to save space on the distillery floor, our team came up with the design to put both columns on top of the kettle. One of the biggest benefits of shopping with StillDragon is that we know how it is supposed to work, and we know the secret ingredient for this kettle.
3 Best Benefits of Using the DoubleDragon
Smaller Distillery FootPrint
Having 2 Columns on top of the kettle allows for the system to have a smaller footprint, which means you can use the valuable real estate in your distillery for storage, working room, or a bigger tour group. But, most importantly, more space to be able to add on the further your distillery grows. Which means more tank space, pilot system, or even a continuous still.
Lower Labor Costs
Typically, the DoubleDragon is set up with a Copper Whiskey Helmet, for the pot still, and a Spirit Column for a plated reflux column to be able to create the more pure spirits such as Vodka. This helps alleviate the need to take apart your column in order to switch spirits, in fact, a quick washout and you should be able to jump from Whiskey production to Vodka production.
Operational Financial Benefits
Having both columns using the same kettle charge, allows the kettle to be closer to the heat source which means you will lose less heat.
You also only need to purchase one large kettle.
Thank you for coming by to read about our StillDragon Double Dragon and all of the great benefits of one! If you are interested/have any further questions please reach out to Emily. Her email is emily@stilldragon.com.
If you need more information on the DoubleDragon, check out this YouTube video of how the DoubleDragon functions. Click on this link to head over there: https://www.youtube.com/watch?v=6W3ND4Fig6c.
Choosing distilling equipment can be about as complicated a task as you want it to be but it isn’t as daunting as it can seem at first. Distilling has been practiced for thousands of years, and your setup can be as simple as a basic pot still or as complicated a setup as you can imagine and possibly even more complicated than that as you learn more. While there isn’t a one size fits all approach to choosing the right distillery equipment for you there are a few things that can help you narrow down the list of potential equipment to make it a lot more manageable.
There are two main ways to approach picking the right distillery equipment for your operation, an operational approach and a budgetary approach. The budgetary approach is pretty straightforward, you figure out how much you have to spend on equipment and you do your best to make it work with what you have. This may not be a bad way to get into a new hobby, but it is a frightening way to start a business, and if you plan on making any money, you’ll have to look at things operationally. Even if this is an experiment or a trial project, you’ll get a lot of benefits from going through the exercise of looking at this from an operational standpoint.
Starting from an operational approach, you’ll want to focus on your operational flow, production goals, and product mix. Figuring out production volumes will be necessary to size the equipment you’ll need properly, and different spirits may require different equipment. Gin baskets are wonderful for making gin but don’t help much with rum or whiskey, for example. Knowing your production volumes will help size any of these specialty items you’ll need as well as your main production equipment. A good way to look at sizing equipment is like buying shoes for a child. You want to leave room for growth, but you don’t want it to be so big that it’s almost unusable. Finding that sweet spot can be difficult if you’re taking a shot in the dark, but with a plan in place, you should be able to get closer to the mark.
Aside from the sizing of the equipment, knowing your product mix will help you figure out what kind(s) of equipment you’ll need. While it’s theoretically possible to make vodka on a pot still, it’s just not very efficient, and you’ll spend more money over time rerunning spirits than the cost of the column. You can use several pieces of equipment to do multiple things, but sometimes there’s no substitute for using the proper tool to save you time and money.
Timing is also an important factor, and you’ll want to pick a timeline to get started. Custom systems can take anywhere from 6 months to a year to put together, and even items that are in stock will likely need to be modified to fit exactly what you need. We can do a lot off the shelf, but often you’ll spend more time and money trying to retrofit something to “make it work” than if we work together and get it right the first time.
Choosing the right distillery equipment for your operation isn’t exactly easy, and your plans may change as you grow and your operation evolves. That’s where modularity and the ability to add or modify equipment becomes a wonderful convenience, but you’ll still need to start from a good basis to make life easier for you. We’d love to be part of your startup or expansion plans, so please reach out or leave a comment below to let us know how we can help!
A general explanation of what a CIP is/does for your distillery
The definition of a CIP is – Cleaning In Place. I know what you’re thinking…that’s a pretty broad definition since most cleaning is done in place. So let’s break it down.
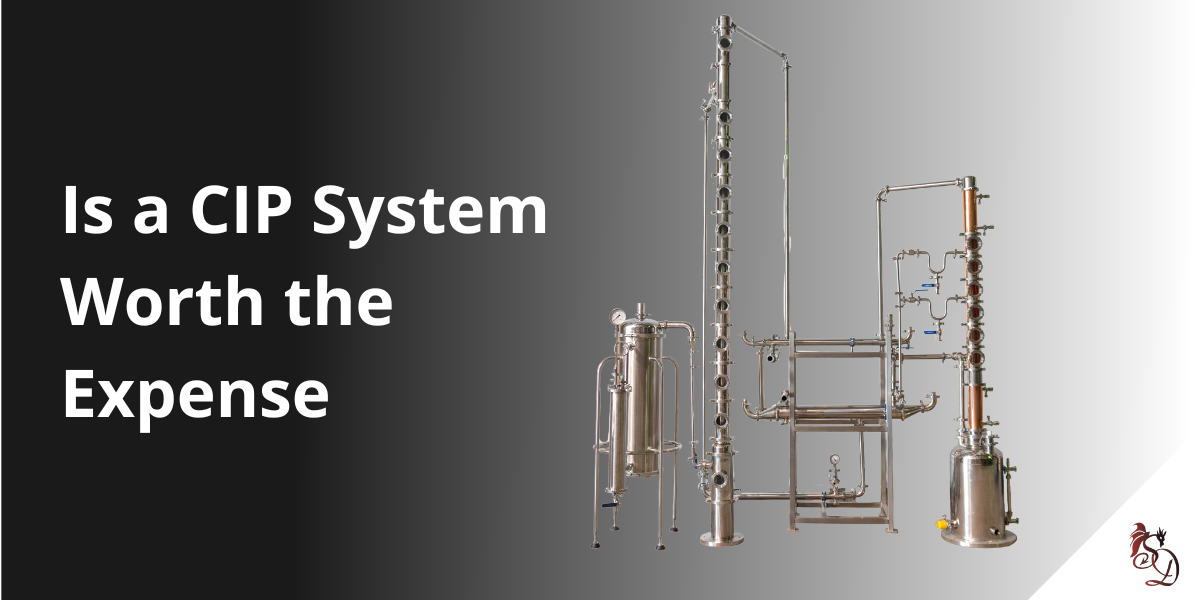
For most nano and microbreweries/distilleries, they don’t own a CIP reservoir (photo shown above), instead, they consider a CIP from the CIP arm from their tanks. The CIP arm is usually located on the right-hand side of the fermenter, and it’s connected to a spray ball that’s inside the tank. The spray ball is a small stainless-steel ball that has small holes throughout it. So, for example: if you connect your hot liquor with enough pressure, the water goes through the arm into the spray ball; the spray ball then spins, pushing the water in an even manner to hit all of the inside of the tank. When it comes to the cleaning part of the tank, it’s very easy to clean that tank in place with the CIP arm, a pump, the absolute out (the bottom valve of the tank), and your chemicals. Hook it all up and let it circulate, and the cleaning in place has begun!
Is a CIP System a Must Have?
Well, it depends on the size of the production of your distillery/brewery and how large your team is. If you are producing around 217,000 Gallons as a distillery, it makes sense, and as a brewery, around 7000 Barrels. That is a large quantity where it’s better to save your water and chemicals as much as possible. So, you would be able to have your caustic/acid that’s heated and next to it your peracetic acid/sani in the reservoirs of your CIP station and cycle those chemicals through all dirty equipment other than dumping it out and using more.
Plus, it helps with the hands-on deck to be able to focus on packaging, fermentation, distilling, and brewing. CIP stations are definitely more of a luxury than a mandatory piece of equipment unless you’re a large production facility with a small team. Contact the team at StillDragon with any possible questions you might have!
If you are seriously considering getting into the distilling business, the first thing you’ll need to understand is that you had better be passionate about spirits and all the work needed to gain traction. You’ll likely need enough self-awareness to understand that you’ll have to have a good bit of courage to back up your passion. Being adequately capitalized certainly doesn’t hurt either. As an aside, I’d say the joke told the most at distilling conventions is:
How do you build a million-dollar distillery? With two million dollars!
All joking aside, you’ll be faced with several barriers to entry. Be prepared to bleed money for at least three years.
But once you’ve cinched up your belt and decided to move forward with your new distilling adventure, you’ll need to come up with a recipe or two and get some honest feedback from a group of friends (or not friends) that will act as your sensory awareness panel. Oh wait, let me back up a bit.
Distilling is illegal without a Distilled Spirits Permit (DSP). That complicates things. How are you going to learn how to produce a distilled spirit if you don’t know how to distill and can’t learn unless you commit to acquiring your DSP, along with all that entails? More on this later.
So, let’s then start with a concept of how you see yourself creating your brand. What flavor profiles do you prefer in your gin? How many SKUs will you have? How will your bottles look? What style will your labels be? Will you have a tasting room? How will you market yourself beyond your physical presence?
Once you start to put some of your ideas down on paper, you can move on to the operating costs and capital expenditures. I assume that you’ll need to produce enough finished spirits for sale to at least cover your operating costs and hopefully slowly pay back the capital expenditures. To do this, you’ll need to assign a price to your finished bottle of spirits, and then determine how many bottles need to be sold in a month to cover your monthly expenses. Pretty basic, right? For example, let’s say your monthly expenses are $12,000 and your finished product nets you $7 per bottle through distribution. You’ll need to sell 1,714 bottles per month.
But the goal here is not to cheap out and size your commercial gin distilling equipment to produce only enough finished spirits to meet the monthly nut, right? The goal is to have the capacity to scale up as the business gains traction.
You can do this by adding more shifts. But this invariably means higher labor costs, chipping away at your net profits. Therefore, sizing your commercial gin distilling equipment to optimally exploit the economy of scale is very important if your goal is to make money. A 500 L still will have to be run 14+ times per month to produce 1200 / 750 ml bottles. Will you have enough time to also market, do the recipe development, clean the distillery, pick up supplies, bottle, deliver inventory, get home in time for dinner (so forth and so on) if you are handcuffed to the still every other day during the month? It’s something to think about.
Gin Production
Let’s move on to the fun stuff – making gin. There seem to be two models that have evolved for gin production:
The distillery produces the neutral spirit needed as the base for the gin recipe.
The distillery procures the neutral spirit beforehand and only redistills to pass alcoholic vapor across the botanicals for vapor extraction.
The former can be very time consuming without the right tools for the job – namely, a very tall rectifying column. Though pot stills can be used to make a clean spirit, the time needed to do so is far more than a proper column.
The latter has drawn criticism from spirits purists and industry professionals. Ultimately, what is most important is to not be deceptive about the production methods and, of course, to bottle a quality finished product that is worthy of sale. If it tastes good and is worth the price, then that is all that really matters to the consumer.
The next tier of production protocols has more to do with how to install the botanical goodness into the finished spirit. Again, there are two methods:
Botanicals maceration in an alcohol / water solution followed by distilling
Vapor infusion with a botanical basket installed somewhere in the vapor path
In some cases, master distillers do both, as either method does render botanical goodness differently. You’ll need to decide for yourself which you prefer. But why do both? Why not take the opportunity to create as many different flavor profiles as possible, especially since we are focusing on starting a gin distillery?
Flavor Profiles
Speaking of flavor profiles, one problem that can exist with respect to creating a reliably consistent finished product year after year is that your botanical supplier may be sourcing from various locations that may experience completely different weather patterns. As you can imagine, temperature, rainfall, and soil composition will affect a single botanical differently. Also dried vs. fresh botanicals will also yield their goodness differently. So how do we create a profile that will reliably taste consistent year after year? How do we charge the gin basket this month with botanicals that have been dried because that is all that was available, as to opposed to last month when we had all fresh-picked botanicals?
Well, one method is to only do single botanical batches rather than combining all the botanicals into a single basket charge. Distill each botanical individually and build a stockpile of bulk for each botanical. Then blend each rendering individually according to a specific, desired profile. Additionally, hold back about 20% of each individual bulk distillate to blend back with the next forthcoming batch to ensure a more uniform consistency. This will help to manage seasonal changes in the botanical’s goodness profile. This method provides a technique in which producing a flavor profile could be likened to mixing a paint color according to an exact formulation.
There are arguably dozens of ways to skin this cat, so you’ll need to think this through and find the best way to utilize the tools you’ll have available. For a more comprehensive look at gin styles and production methods, check out the StillDragon Gin Basket Operation Manual.
BRANDING AND MARKET SATURATION
If your state has favorable tasting room laws on the books, you’re in luck. The margins for bottle sales and cocktails can be very rewarding. But how do you keep from being eclipsed by the big boys with their deep pockets? How do you get that top-shelf position in the liquor stores? How do you stay relevant if your state has a distillery or two in every city? Don’t panic! The answer is that this market oversaturation strategy has been working well in other industries for a good long while now. Think about the fast-food chains, drug stores, grocery stores, and car dealerships. These businesses are on every third street corner.
If you go out and win your own backyard, you can make this work. Get your neighbors excited about what you are doing. Educate them. Teach them why your gin is going to be the most amazing gin they have ever experienced. Tell them about the process. Get them involved. Be friendly. Be excited. Learn how to court everyone’s attention. Do not isolate yourself. Be bold. You must sell yourself. You must claim your own backyard. There will be enough business to support your little boutique gin distillery.
Obtaining a DSP
Let’s circle back to discuss the legality of first learning to distill without a DSP. You cannot. It is illegal to distill without approval from the federal government. So, how do you learn to distill before committing the resources needed to start your gin distillery business? Restaurants usually don’t hire chefs with no experience, right? How can a distillery succeed without an experienced distiller?
It would be in your best interest to attend one of the annual distilling conferences held by the American Distilling Institute (ADI). This organization focuses on newly minted distillery owners as well as people looking to get into the industry. ADI’s conferences provide valuable classes that teach various elements of distilling as well as offer breakout sessions that cover the business and marketing components. Additionally, there are experienced distillers in attendance with whom you can network and gain valuable insight into the business of distilling. The annual conference is also a valuable resource for finding suppliers for all manner of supplies and commercial gin distilling equipment.
In addition to attending conferences, there is quite a bit of reading material available either online or through actual printed books.
There are also several distilling schools available with courses that range from just a few days to a few weeks or more. And lastly, you can always solicit a distillery in your area to participate in an apprenticeship.
Good luck moving forward, and don’t hesitate to contact our team at StillDragon North America at info@stilldragon.com for any assistance.
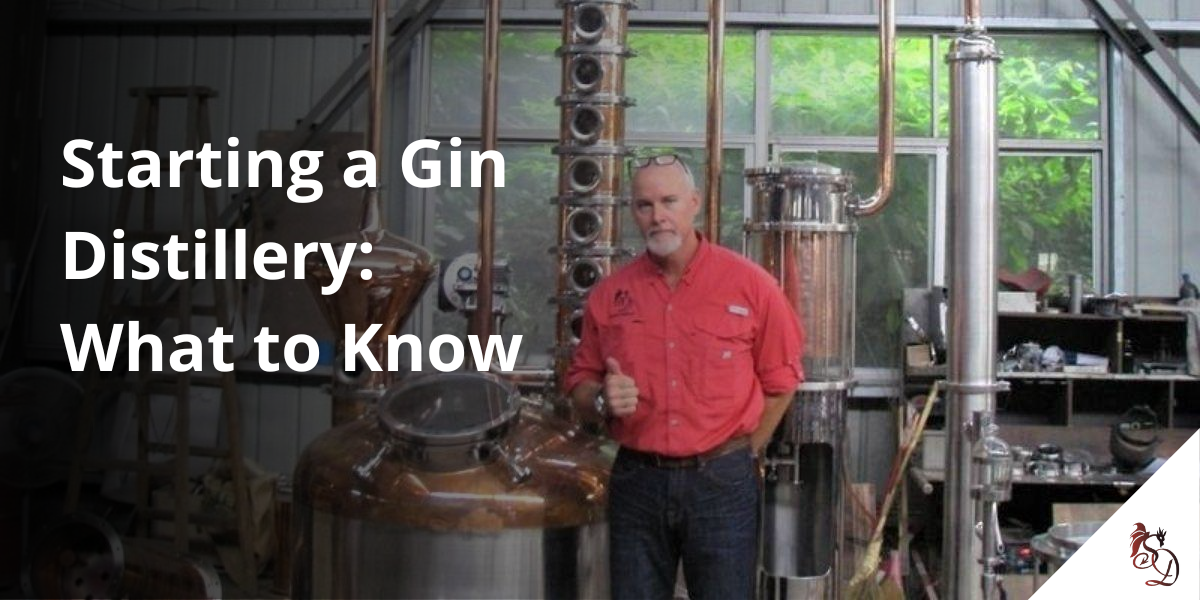
Gin stills are very near and dear to our hearts since most of us here at StillDragon are gin enthusiasts. Producing gin can have some challenges that make it a little more difficult to effectively add it to your production rotation but thankfully they’re not insurmountable. The simplest way to get around most of these challenges is to have a dedicated gin still but like with most things in life there’s a cost benefit analysis you’ll want to do before deciding what’s best for you.
Dedicated gin stills are a wonderful thing but it can be painful to sacrifice your limited floor space when you’re first getting started in addition to adding expense. They have so many advantages though that if you’re planning on making gin at any kind of volume past a test batch they are normally well worth the space and the money.
Oils from the botanicals that give gin its distinctive flavors and aromas are wonderful in the gin bottle but they can be difficult to clean off of still parts and they’re not so great when they contaminate other products. Since vapor infusion comes so late in the distillation process you may be able to get away with a dedicated gin product condenser instead of an entire dedicated gin system.
This can be a great cost savings method for vapor infused gin but it won’t work for maceration. For macerated gins there are still some cost saving methods you can take to make adding a dedicated gin still more palatable.
One method is to use a fairly basic set up with a single walled kettle to save money. Single walled kettles are much less expensive than the jacketed variety but you run an increased risk of scorching any residual solids or proteins in the kettle charge. You can mostly get around this with maceration by using muslin bags or filtering the solids before distillation but different ingredients can react differently to high heats.
Another benefit of using a dedicated kettle, especially if gin isn’t your primary product, is that it can double as a recipe development still depending on the volume you want to make. Testing recipes and controlling quality will be crucial to trying any new product, especially something as complex as gin.
Quality control issues can cost customers. Most people who aren’t gin drinkers don’t want their favorite spirit to taste like gin. In fact most gin drinkers don’t want other spirits to taste like gin either! By not having dedicated gin stills you could be turning away potential raving fans of your brand by not putting your best foot forward with every bottle.
We’d love to be a part of you making your best spirit and being a wild success so please reach out to us and let us know how we can help!
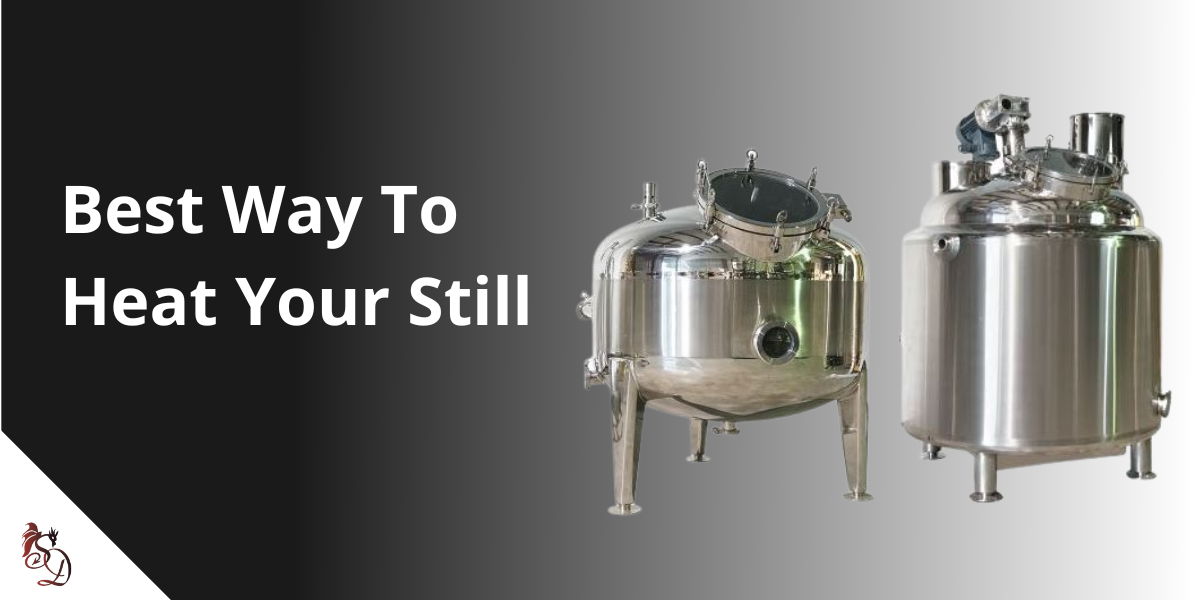
There are a couple different ways to heat your still. I’ll comment on each method. I will say however, very frequently if on a shoestring budget the best way is usually whatever resource is available. So, there is that.
Let’s start with the oldest known method. The open flame. There are several fuel sources available. Wood being the oldest known fuel can often be the most readily available. Heating with an open flame does present several safety challenges since the rendered finished product during distillation of spirits is highly flammable. One could argue that an outdoor, well-ventilated environment is best for firing the still with wood as the fuel source. Not all jurisdictions will allow for an open flame use. You’ll need to check with your Authority Having Jurisdiction.
Propane or natural gas comes to mind as the next most logical fuel sources for running an open flame to heat the kettle while distilling. In modern times either of these fuel sources are readily available. The only other addition needed would be a burner set up under the kettle for either type of fuel.
Wood or a fuel source like propane or natural gas can also be used to fire a steam boiler, another heating method used for heating a still. Steam is also commonly piped to multiple tanks in the distillery and brewery environment. We’ll touch more on steam use in a bit.
Heat loss into the atmosphere from using an open flame can be significant. Therefore, in order to optimize heat transfer while minimizing loss, some kind of shroud or firebox should be employed to capture or conserve as much heat as possible. Similarly, any insulation on the distilling apparatus will be helpful if exploiting heat / fuel consumption efficiencies is a priority.
Immersion elements are extremely efficient at installing heat directly into the kettle charge since the elements them selves make direct contact with the liquid. The downside to immersion elements making direct contact with the liquid is that if there are any suspended solids at all in the kettle charge, there is likely potential for what we would call scorching. Basically, solids can accumulate on the elements and cook until burned. Think Burnt popcorn.
Needless to say, it is really, really difficult to distill a grain in whiskey with immersion elements for the reason above. However, there are two additional ways to employ an immersion element. We’ll circle back to those examples when we talk about the use of jacketed kettles here in just a bit.
The next most efficient way to distill from a heating standpoint is with steam. More specifically, direct steam injection is a very efficient way to transfer heat. Direct steam injection however is not as efficient as an immersion element and here is why. The heat generated from an immersion element originates on the surface of the element which is making direct contact with the liquid. Therefore 100% of the heat originates and distributed directly into the liquid.
When heating with a traditional steam boiler, even though the steam will release 100% of its energy into the liquid, the origin of the steam source is typically generated away from the kettle and has to be transferred to the kettle via some form of piping. This transfer process represents heat loss. Furthermore, when distilling with direct steam injection, we will also be introducing more water to the beer by virtue of the steam condensing into the kettle charge. In other words, direct steam injection will dilute the ABV of your beer and therefore represents a loss of efficiency on another level. So, in this case any efficiency gained by the superior heat up method ends up loosing value because the reduced / diluted abv will require more effort to produce the final product.
Ok, now let move back to the jacketed kettles and heating those kettles with steam or electric. Let’s start with the steam fired jacketed kettle. Again, here we have steam which provides superior heat transfer characteristics. The steam as mentioned above is piped from the classic steam boiler to the still with steam piping and then distributed into a jacket or casing that envelope the inner wall of the kettle. The jacket would be capable of maintaining 15 psi. on a low-pressure kettle. Once the steam is piped into the jacket and makes contact with the inner wall, the heat carried by the steam will transfer through the inner wall into the liquid in the kettle. Once pressure is achieved, the jacket would then be capable of achieving upwards of 245° F.
For the electric (elements) jacketed kettle, The StillDragon design has a small reservoir on the base of the jacket that is fully integrated into the jacket. The reservoir fill level holds anywhere from 10 or 12 gallons to 20 or 25 gallons of water depending on the size of the kettle. The elements are installed directly into the reservoir and heats the water to boiling. The elements do not at all make contact with the kettle (beer or wine) charge. Once the water in the reservoir reaches its boiling point and starts to produce steam, the steam will rise up and occupy the remaining heads space within the jacket. And again, at 15 psi the jacket would then be capable of achieving upwards of 245° F.
So Basically, this electric kettle design is really nothing more than a kettle with a steam jacket that has it’s own self-contained steam generator.
And finally we come the jacketed electric kettle that uses oil as the heating media. The difference here is that oil is used to fill the larger part of the jacket while allowing room for some expansion. Heat up times are typically slower since the larger oil mass in the jacket has to be fully heated and then the heat has then also transfer into the kettle charge. However, once brough to temp the oil is extremely efficient at maintaining its heat and only requires a fraction of the heat otherwise needed to bring the entire mass to running temps.
All heating methods have their advantages and disadvantages and as mentioned at the beginning of this blog post, very frequently if on a shoestring budget the best way is usually whatever resource is readily available, particularly if you are not willing to invest in the infrastructure of a short term lease, rental property for example.
What is the best way to heat your still? Well, that depends.
Equipment needs for distilleries will vary based on a whole host of factors, and every distillery has its own needs, wants, and bottlenecks. Even though your distillery will be very unique, every distillery has some things in common. Without certain pieces of equipment and capacities in place, your distillery won’t run as well as it could, if it runs at all. We’re going to try to be as universal as we can with this list of distillery equipment must-haves but since every distillery is different, please leave a comment and let us know what your essential piece of equipment is at your facility.
The Right Kind(s) of Hoses
Hoses go beyond simple irrigation fittings and can and should be used in many applications. Hard piping everything in can be great if you’re building a distillery layout that won’t change much over the next decade, but if you’re planning on growing, it is worth it to look into getting hoses and a pump truck to give you the flexibility to transfer between different tanks without switching your piping around. Having the right kinds of hoses on hand can be a lifesaver in your facility, and not using the right type is an easy mistake to make. Hoses rated for high temperatures and/or proof will help your final product quality if your production environment requires them. Using the wrong hose is like having a draft beer from a dirty line; it can impart unwanted flavors and lower the final product quality.
Pump Trucks/Portable Pumps
We touched on pump trucks and having a portable pump can make your job a lot easier. Priming pumps and pumping over a long distance can be a hassle, especially if you’re in a hurry and rushing. Moving a pump out of the way to do a job or moving a pump closer to a job to eliminate long lengths of the hose is never fun, but it’s a lot easier if the pump has wheels!
Enough Condensing/Cooling Capacity
Chillers are a wonderful and potentially expensive addition to your distillery. You can never cool your distillate colder than your cooling medium, so if you like having a colder distillate coming off your equipment, they are a great way to go. If you have decently cool municipal water, you can also go with a sufficiently large condenser, the greater surface area means that you get more heat transfer per unit of volume passing through the condenser. This is a great way to add cooling capacity without adding new equipment, just upgrading what you’re already used to.
Enough Heating Capacity
Similarly to the point above, having enough heat is crucial to effectively running your still. A boiler can be a big expense, but if you don’t have enough power to heat the still with electricity, you could be stuck heating up for a long, long time. A 100-gallon kettle needs over 80 AMPs on a 208V, 3-phase circuit to heat up in an hour, and if you change that to a single phase you’ll need close to 150 AMPs to heat up in an hour. If you have less power or a larger system, it will take even longer to heat up, if you can get there at all, before you start losing heat. Having sufficient heating, regardless of the source, will be crucial to keeping your operations schedule manageable.
Fork Lifts
This one sometimes gets overlooked, but it is crucial to success, even in a small distillery. Pallet jacks are great and if you’re starting off small may be a good enough option to get you started before you’re ready for the expense of a full-sized fork lift. Once you pass the point where the pallet jack isn’t going to get the job done you’ll be happy to have the forklift handy and you’ll be much more productive when you’re not manually moving heavy things around your distillery.
Distillery equipment must haves are always hard to pin down since your distillery’s workflow may be different than someone else’s even if you’re making the same product on similar equipment. Leave a comment below or reach out to us to let us know how we did. There’s always something new to learn and we’d love to hear from you!
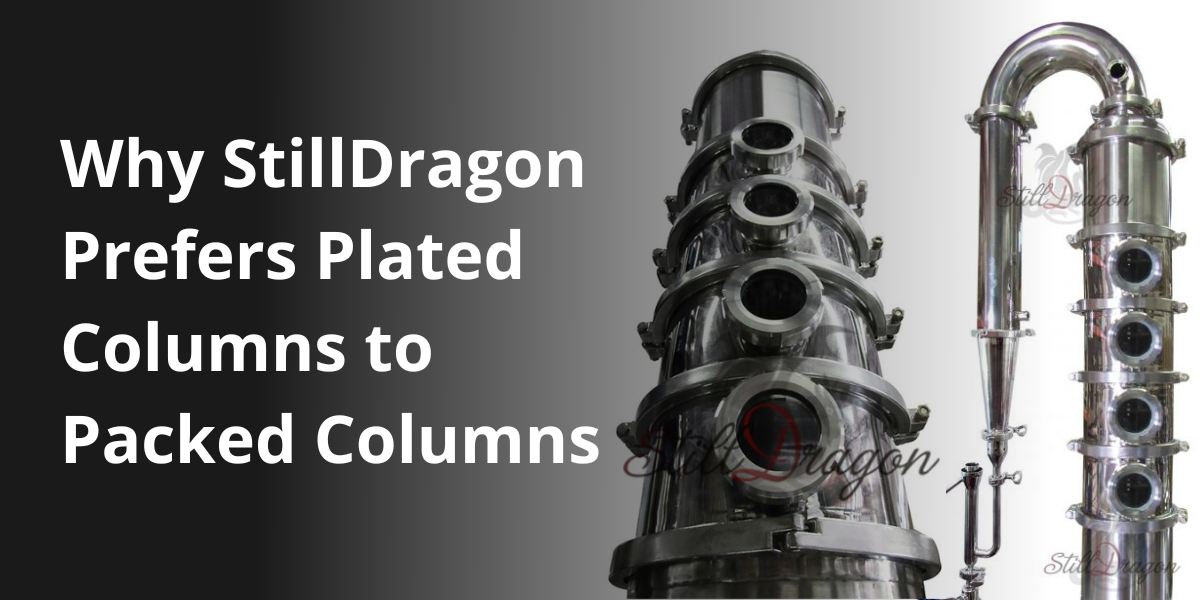
Quite often, we have been asked about mixing different distillation mediums, the differences and whether or not to install a copper packing material with plate sections in your vodka still column? Truthfully, a hybrid solution can help a small startup distillery save money on equipment, and it could help save the valuable ceiling height typically preferred to run a “proper” vodka still column. However, StillDragon prefers the consistency, ease of use, and predictable energy costs that come with a plated reflux column.
Packed columns have many advantages, especially because they may have more distillation cycles per run, but it definitely comes with its downfalls. When the packed column is taken apart, not only do you run the risk of possibly losing some of the copper packing (this is typically seen with unstructured packing), but the finished product can be altered if the packing doesn’t go back exactly where it was. There’s also a factor of weight that comes along with packing, the more dense the packing, the heavier it will be; as the column becomes saturated, the packing is going to get heavier as it holds the liquid droplets. Packed columns, while great, come with a lot of risks.
Packed columns rely on a certain amount of pressure to keep the proper behavior in the column, in order to keep the pressure consistent there is some science and math that goes into figuring out the proper amount of heat to throw at the kettle based on the density of the packing, plus column width and height need to be factored into the calculation. Once the column is taken apart and cleaned, the density in the column changes, in turn the heat needed to pressurize the column could change as well. This variability could cause increased energy costs in the long run.
On the other hand, plated columns have this beautiful ability to remain consistent run after run. Plated columns, aside from being easier and quicker to take apart and clean, are going to be put together in exactly the same place as they were before being taken apart. There are no changes in the density of the column material, so if the same grain bill is used, the heating time should be roughly the same as the last run, creating a more predictable energy cost.
Plated columns generally have a more abundant accumulation of liquid in a more confined place. So, one would say that plates maintain a dense liquid bed, whereas the liquid that accumulates in packing (random or structured) is more or less in the form of accumulated droplets. The droplets in a packed column also have less ability to absorb heat, which will migrate up the column and permit water infiltration, which will lower the ABV. The deeper liquid bed on the plated columns acts as a heat exchange to help minimize heat intrusion into the top of the apparatus.
At a commercial level, plated reflux configurations appear to be the more consistent and predictable distilling column over still packing. StillDragon prefers the easy to assemble, modularity that comes with the plated columns, as well as being able to heat and run the still with a consistent product. For more information about StillDragon Reflux Configurations reach out to us at info@stilldragon.com!
Before we start, let’s first discuss some glossary terms many of us learned in 8th-grade science.
Evaporation
Google says that the definition of evaporation is: “the process of turning liquid into vapor.” This is typically done by applying a measure of heat to the liquid.
Phase Change
The next likely term we learned would have been the term: Phase Change. Evaporation is one form of phase change. Another example of phase change is when we take a liquid and freeze it until it becomes a solid—water into ice, for example. Here again, is Google’s result for the definition of phase change: “A phase change is when matter changes from one state (solid, liquid, gas, plasma) to another.”
Mass Transfer
With the concept of evaporation, or more specifically phase change, understood, we can move on to the next principle, known as mass transfer. And once again, here is Google’s search result for mass transfer: “the net movement of mass from one location (usually meaning stream, phase, fraction, or component) to another.”
Now with the review of phase change and mass transfer, we can now apply our understanding of how phase change and mass transfer are inextricably linked to distillation.
For the simplest, short-path distillation, only three-phase change cycles are required. From liquid to vapor (gas) and back to liquid as the finished distillate. The humble pot still is the closest example to this for distilled spirits. Make beer or wine, heat up until the liquid is hot enough to render forth vapor; pressure created by the heat then directs vapor through a basic pipe (mass transfer) toward a heat exchanger that will condense vapor back into liquid form to be collected as distillate. The resulting distillate will have a significantly higher alcohol concentration than the original alcohol content of the beer or wine in the kettle.
If we take the resulting distillate and run it through the pot again, the alcohol content would be even more concentrated. So, the concentration will increase each time we run the resulting distillate. The trouble with this plan, however is that distilling in this manner requires quite a bit of time and energy, particularly if optimal separation is one of the goals.
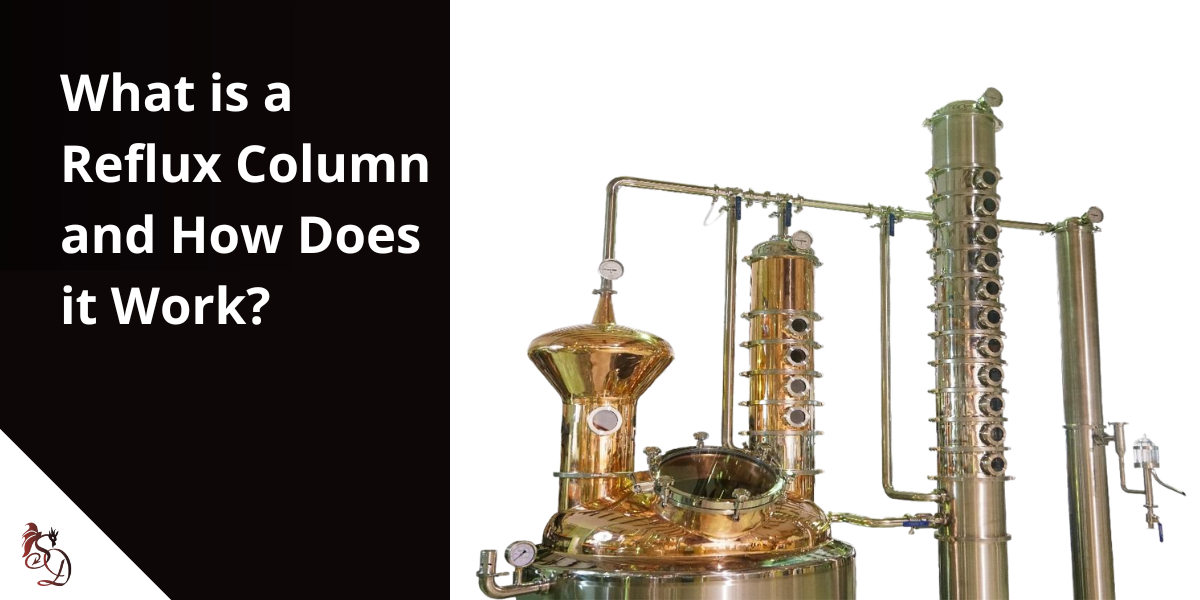
So how do we hack this problem? How do we incorporate multiple phase change cycles into a single run? How do we optimize our ability to distill so that our resulting distillate has a very high concentration of alcohol? We would use the concept of forced reflux and create a tall column that has multiple plates or landings with which liquid can accumulate and be redistilled. Basically, a distillation system allows for multiple phase change cycles during a single run.
Reflux
Further enhancing this process is a heat exchanger at the top of the column that will condense a percentage of vapor back into liquid form to be redistilled. This forced condensing at the top of the column sends back very high ABV. The liquid formed at the top of the column due to this forced condensing is referred to as reflux. At some point there will only be enough room for so much volume of liquid reflux, that some of the liquid will then be forced to return or drain to a lower portion of the column.
The return of this reflux will then enrich the material (liquid and vapor) by displacing the higher nonalcoholic content at the lower levels of the column. This will also affect the temperature gradient within the column. As this occurs, the heat needed at the top of the column to create additional phase change cycles will be some what reduced compared to the heat entering the base of the column where the ABV is less enriched. This is essentially known as a temp gradient. The result is higher ABV at the top of the column and a graduation of lower ABV down the length of the column toward the kettle.
Temperature Gradient
Here again we ask Google to explain temperature gradient: “the rate of change of temperature with displacement in a given direction (as with increase of height)”.
The temperature at any given point on the column during a distillation run can tell us the approximate purity of alcohol at that level. However, since liquid temps will always be cooler than vapor temps, it can be difficult to pinpoint purity levels in a column that has simultaneously mingled liquid and vapor. To help illustrate the notion of purity in liquid form vs vapor form, please see this ethanol phase diagram below.
After reviewing the liquid and vapor temps at different levels of alcohol concentration we can then visualize that the actual temperature within the column at a specific purity will likely be somewhere between the vapor temperature and liquid temperature shown on the diagram. This assumes that an RTD or temp probe located at the plate is influenced by both liquid and vapor.
The above summary more or less characterizes what is happening inside of a reflux column though may be difficult to visualize?
Ready to run?
Ok so let’s fire the kettle and make some high proof spirits.
First bring your kettle charge (beer or wine) to a boil. You’ll need to decide if a rapid heat up or a slow heat up is most beneficial. There are opinions for either choice. I am ambivalent. Once the top of your kettle is too hot to touch with your bare hand comfortably (scalding is 130°F) turn your cooling flow to your reflux condenser on and allow for full flow. Though not at all necessary for lower proof spirits, full flow to the reflux condenser will allow for the highest possible ABV. With a 10% beer or wine charge, your kettle should start making vapor at about 190° F. Once we observe any kind of liquid condensation on the viewing windows of our column, we will (if needed) reduce heat input enough to ensure that no alcoholic vapor can be pushed past the reflux condenser and exit the vapor outlet to the product condenser.
This is essentially called “100% reflux” mode. We will stay in this 100% reflux mode for as long as it takes to shift as much alcohol from the kettle into the column (via mass transfer) as possible. A good indicator that we have maximized the alcohol transfer is by monitoring the temperature of one or more plate or liquid landing levels. Once the temperature (especially at the top two or three plates) has stabilized, we can be confident that we have allowed as much alcohol to populate the column while simultaneously allowing the bulk of water to cascade downward back toward the kettle essentially. We execute this phase of the run while not taking (to the extent possible) a single drop of distillate. Again, this process allows for full enrichment of the column in order to maximize the ability to collect the highest possible ABV in our distillate. This is the essence of 100% reflux mode and is also known as bringing the column into equilibrium or steady state.
Here is the Google search result for these glossary words. Equilibrium: “a state in which opposing forces are balanced. And here is steady state: “a state or condition of a system or process that does not change in time”.
Once you are satisfied that the column is fully enriched with alcohol, you are ready to start collecting distillate. The first drops we will take will be a Foreshot. The foreshot is characterized by a sharp smell of acetone. This distillate is essentially a very potent nerve toxin and should not at all be consumed. The next bit of distillate to come over will be Heads. This distillate may also have an odor of acetone as well as an additionally fruity aroma. You can collect Heads by slowly reducing the cooling media flow rate to your reflux condenser. Or you can increase the heat input. Or you can do both. Be mindful however that any adjustments to the system should be made incrementally so that you as the operator can learn to gauge the impact of the adjustment.
The system may very well take several minutes to reflect any adjustments made fully. The goal here for the heads cut is to draw product out of the system slowly so that we can ensure that our center or Hearts alcohol does notbleed into the Heads as we slowly collect. Heads distillate can have a sharp, acetone odor to it and is largely viewed as not good for consumption. Particularly if vodka production is the goal with your reflux column. Acetaldehyde and Ethyl Acetate are largely responsible for Heads aromas. Though depending on how efficient your column design is, there could also be some ethanol within the Heads constituents. This is why we draw heads off slowly so that we can minimize the amount of ethanol that may bleed off. Remember, it is ethanol that we are trying to collect.
At this point we have effectively made our fores cut and our heads cut. You will need to use your own sensory awareness to determine what the volumes should be. Temperatures do not dictate what constitutes acceptable tasting spirit. ABV does not determine what constitutes acceptable tasting spirit. Temperatures and ABV should only provide a guideline. The best placement for a temperature probe on a reflux column is at the highest possible location on the column. If we once again refer back to the ethanol phase diagram, we can see that there is a direct relationship between temperature and ABV.
At this point it is time to further reduce cooling flow to the reflux condenser or increase heat to the kettle in order to collect distillate in a timelier manner. Or both. You will need to determine how fast that should be. Be mindful however that the goal here is to maintain a high ABV for the duration of the run. If your ABV becomes too low (particularly during the early stages of the run) you may have reduced cooling flow too much or increased heat too much? Adjust your heat input and or flow control on your reflux condenser accordingly and continue to monitor ABV and the temperature at the top of the column.
Once adjusted correctly, the duration of the run should be holding proof very consistently and the plate behavior should look very uniform from the top plate to the bottom plate.
Here is an example of good plate behavior:
Proof Gallon
With some basic math we can determine how many proof gallons of alcohol are in the kettle and compare that with how many proof gallons we have collected as distillate. This calculation should help you determine how much time you should spend collecting finished distillate.
Google says the definition of a proof gallon is: “one liquid gallon of spirits that is 50% alcohol at 60°F”. A proof gallon is the metric by which the government taxes spirits by the way.
Well, that is all for now. Congratulations. You are one step closer to running a reflux column.
Contact us anytime here at StillDragon or log onto the global forum (stilldragon.org) with any questions. Good luck.
What size still do I need? As you can imagine, this question comes up quite a bit around here, but it’s not as straightforward a question to answer as people may think. The still is a tool and a very important piece of equipment that can help you hit your goals.
However, your goals shouldn’t be too constrained by your equipment, and if you don’t know how much product you’re looking to sell, then you can’t know how much you will need to make. We all have constraints to work around, and any project will have to deal with reality at some point, but there’s no reason to make your goals more difficult to achieve by not setting yourself up for success.
Still types and sizes are very important to consider when you’re getting started in distilling since some spirits require very specialized equipment, like gin baskets or a tall vodka column. Aging is another concern; it’s very difficult to have a 12-year-old spirit in year 2 without sourcing or rapid aging, both of which are beyond the scope of this article. Deciding on the appropriate still size is almost like buying shoes for a toddler; you want there to be some room for growth, and going too small is just wasting money.
Predictions are hard, but it’s very difficult to achieve if you don’t set a goal. Plan on what you want to sell in years 1 and 2, and go as far as you feel comfortable predicting the future. You may decide year 3 or 4 is a great time to upgrade, or you may want to push that off, and there’s no one size fits all solution since everyone will be making their own product and have their own goals.
Starting materials play a part too. Solids and residual proteins can burn immersion elements pretty quickly if you’re not careful, and dealing with grain in wash versus laundered wash can require different equipment.
Adding more fermenters or grain separators to your facility later can be relatively simple, but certain pieces of equipment, like the still or a mash tun, can be a little more difficult to add on later. Adding copies of existing equipment will be more expensive per liter than having larger versions of the same equipment. It can also gobble up your floor space pretty quickly too. By planning ahead and buying the right tools for the job, you can hopefully save some growing pains and avoid unexpected surprises later.
Right-sizing your still and other equipment can be difficult, and there’s no one size fits all solution. It takes a lot of planning, and even with a solid plan in place, you may have a surprising number-one seller down the line. One of the good things about having a modular system is that with a few tri-clamps, you can modify or upgrade bits and parts without getting a completely new system.
Make sure you’re upgrading wisely; putting your old four-inch column on top of a 380L kettle won’t help you produce spirits any faster! If you’re looking to get started or looking for your next upgrade, give us a call, send us an email, or leave a comment below, and we’ll be more than happy to help you find the right system for your needs.
Distillery overhead is sometimes hard to pin down because each product has different variable costs. Fixed costs are relatively easy to calculate since you’re likely not hiring new employees or buying new equipment every month but if you are you’re hopefully making enough money that you’re not reading articles about calculating operating costs. The variable costs on the other hand can be a completely different story.
Your equipment and facility cost aside from utilities should be fairly straightforward to account for. One-time expenses should be amortized along the usable life of the equipment and there is a baseline for power and water that could be considered “fixed” even though there may be some jitter month to month. Payroll and personnel costs shouldn’t change much if you work a steady schedule but can be wildly thrown off by changing production demands or meeting large contracts or sales obligations. Ideally, those swings in costs should be net positives due to the increased revenue, as long as they’re planned out properly.
Your grain bill can be a big source of variability in your final product. Someone using silage corn versus a rare heirloom variety can have a drastic difference in operating expenses to run their still. Similarly, if you can do your run in 4 hours you may have lower operating costs than someone who takes 12 hours or more to make the same amount of spirits. Sometimes skimping on the materials or equipment can help you spend less start-up money but the personal hours or inefficiencies in the system can add up to cost more in the long run. ROI can be positive or negative so you’ve got to sit down and do the math for what makes sense for your operation.
The most difficult costs to account for ahead of time are by far the opportunity costs. If you decide to get a very simple setup and only run a pot still you’ll miss out on the flexibility to make gin and vodka and if you can’t sell a white spirit you’ll have to wait on the cash flow from your aged spirits. Hindsight is 20/20 so don’t beat yourself up for what you didn’t know at the time. Learn from your mistakes, try not to repeat them too often, and keep moving forward. None of us have a crystal ball to see the future but we can choose whether or not we want to persevere.
How much does it cost to run a still? As much as it takes to make as much product as you’re planning on at the quality you’re planning on making it! Balancing costs can be tough and cash flow is even more difficult with inflation being what it is today. The trick is to make wise decisions on where to spend and where to save without “saving” yourself for the poor house. Leave us a comment below to talk about your current needs or future plans or give us a call and we’ll be more than happy to discuss your options.
Vodka stills come up pretty often around here and we’ve writtenseveralarticles about them in the past year. Whether you’re using our Crystal Dragon, Stainless Steel, or Copper Column, it’s important to make sure that you’re using the right tool for the job and the best still for vodka.
The best still for vodka is a matter of some debate but there are a few ground rules. First, you’ll need a lot of plates to consistently pull off product at 95% ABV, the TTB legal requirement for making vodka. Our recommendation here at StillDragon is that at a minimum a commercial system should have around 18 plates in a standard vodka column. It’s important to keep in mind that more plates gives you a wider operating range and you can have up to 30 plates before the math shows diminishing returns. A major benefit of having more plates allows the equipment to do the work and have more separation steps (plates) in the process. By having more separation steps you’re doing the heavy lifting with the equipment itself so you shouldn’t need to run the system in full reflux for nearly as long. This will save you in the long run by lowering your utility demands for both the heat and cooling water demand and save you time during the run.
The amount of plates isn’t a hard and fast rule and sometimes you just aren’t going to have the ceiling height for a 30 plate column in your current space. You can theoretically make a shorter column work but it will be more difficult to consistently pull off 95% ABV spirit but just because you can doesn’t necessarily mean you should. High reflux ratios can drive the proof up but without enough plates collection speeds will be slow. Time is money so it will normally be well worth the investment to get the right tool for the job instead of chaining yourself to a piece of equipment that’s slower than it needs to be.
Speaking of slower than it needs to be, many customers ask about using an all-in-one system versus a system purpose built for vodka. There’s nothing at all wrong with using a system that can do it all, especially if it saves floor space in a tight area. However, just like a Swiss Army Knife is a handy tool to have when you don’t know what you’ll need, it’s not the best tool for most specific jobs. An all-in-one system can save some space but they don’t save time and they make what could be a series of individually pretty short tasks into a potential marathon to make the same spirit. It’s similar to running split columns to save ceiling height, it’s possible to do it but you’re making life more difficult on yourself than you have to. It takes a lot of attention to keep a split column running and it’s almost always not optimal. One column will almost inevitably be starved and not displaying goon plate behavior in these setups. If you absolutely need to save height you may consider running a stripping still and a smaller vessel for your vodka runs. This can actually save you money on equipment and add flexibility to your workflow.
Vodka stills can be a little tricky to wrap your head around if you’re not used to them but they are not too different to running any other column still. It’s not quite as simple as adding in more plates but it’s also not much more complicated than that. Just like with most things distilling, finding the best fit for you may take some tinkering and experimenting. We’d love to help and use our years of experience to help you not reinvent the wheel when you’re getting started or on your next distillery upgrade. If you have questions or feel lost please give us a call or shoot us an email and we’ll be happy to help!