Beginner Rum Recipe

Getting started in distilling is a lot of fun and we wholeheartedly encourage it where it is legally possible to do so. Please always check with a lawyer or your local law professional if you have any questions on what is and is not allowed in your area. Rum is a fantastic place to start since it has a long history and a deceptively simple recipe that can give you a lot of room to play with and put your own touches on. Before we get into the nuts and bolts of the recipe let’s dive into a little more about the spirit itself.

The Basics of Rum

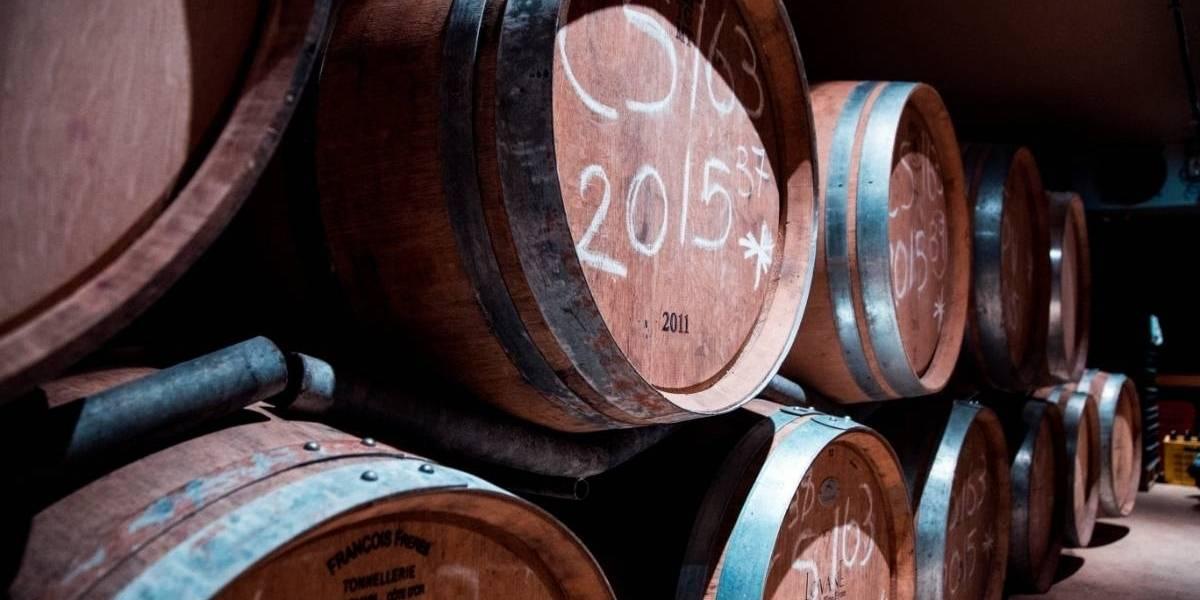
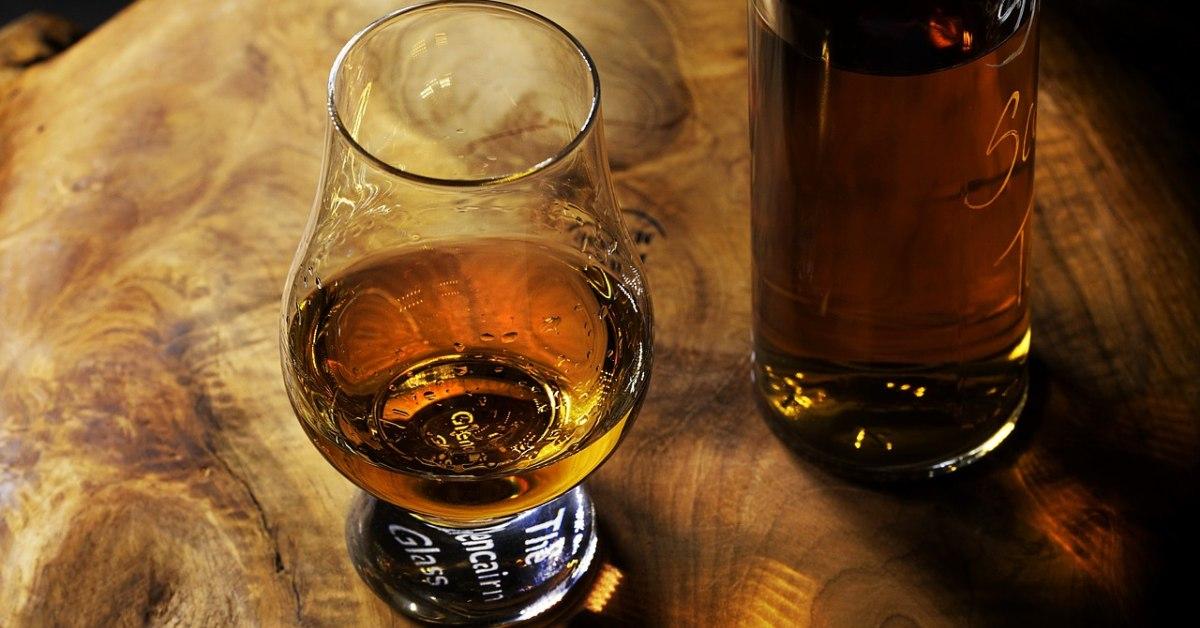
Rum is an extremely diverse spirit with influences from all over the world. Whether you call it rum (English), Rhum (French), and Ron (Spanish), the melting pot of the Caribbean made this spirit what we know and love today. Because of the diverse influences, there are several wonderful takes on the spirit and how to make it. White rum is clear in color where golden rum retains its color from the aging process.

In this case, white doesn’t mean unaged, it describes the color of the liquid itself. Several commercially available white rums are aged then filtered to remove the color. There’s a high chance that this is a contributing factor to why your rum doesn’t taste the same as a commercial rum you’re trying to replicate at home. Spiced rum is infused with spices after distillation and is its own category. Agricole is a different designation using fresh cane juice instead of molasses. The flavor is very different and can have more grassy, vegetal notes than rums made from molasses, which tend to have more caramel notes in the flavor profile. 

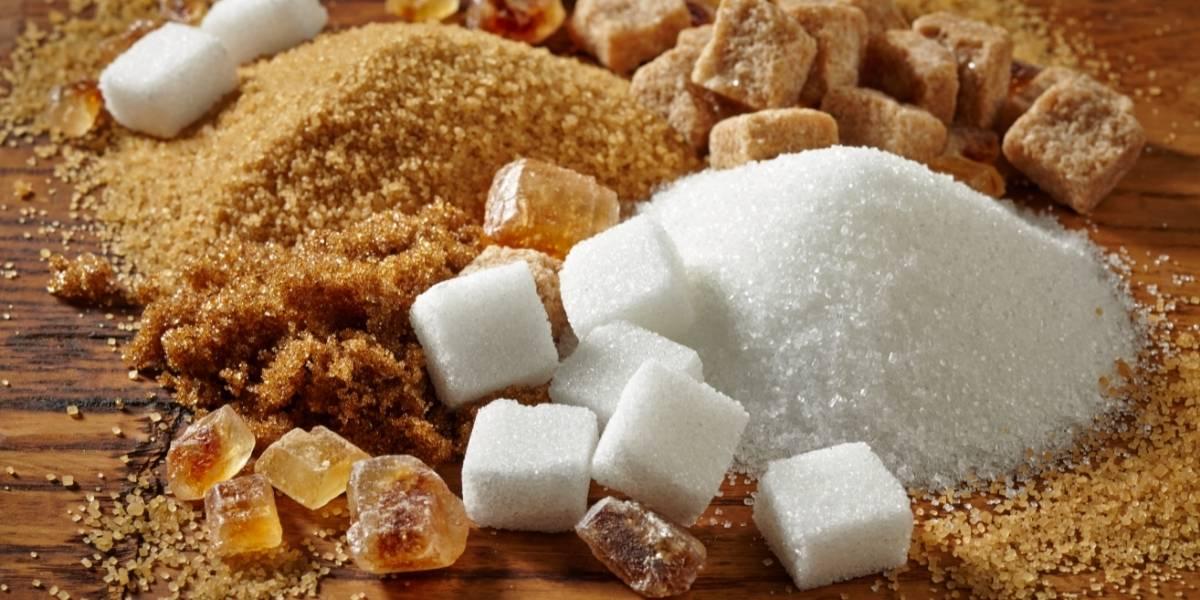
Another big difference is the quality of molasses and/or sugar you’re using. Molasses is the traditional sugar source for rum producers as a way to recycle. Molasses is a byproduct of the sugar refining process and as technology has improved there is less and less residual sugar left in the molasses compared to even a few years ago. In order to get the flavor profile, you’re looking for it may make sense to add in raw sugar or brown sugar to give the yeast more to eat and make your final spirit more palatable. There are several different grades of molasses and they are all refined to a different level and have different nutrient content. Blackstrap molasses is the least expensive but will need the most added sugar to be palatable. Store-bought molasses should have a much higher sugar content than blackstrap so it may not need any added sugar. Whatever molasses you choose make sure it is unsulphured or else the yeast will not be happy and unhappy yeast lead to unappealing flavors coming off the still. 

Making Your Beginner Rum Recipe

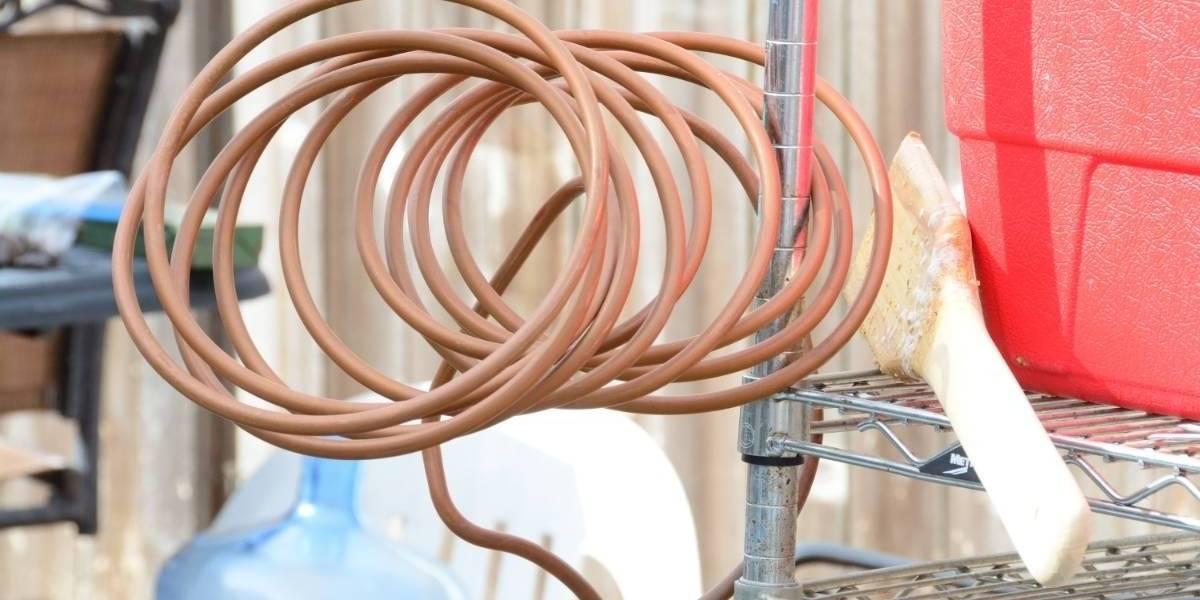
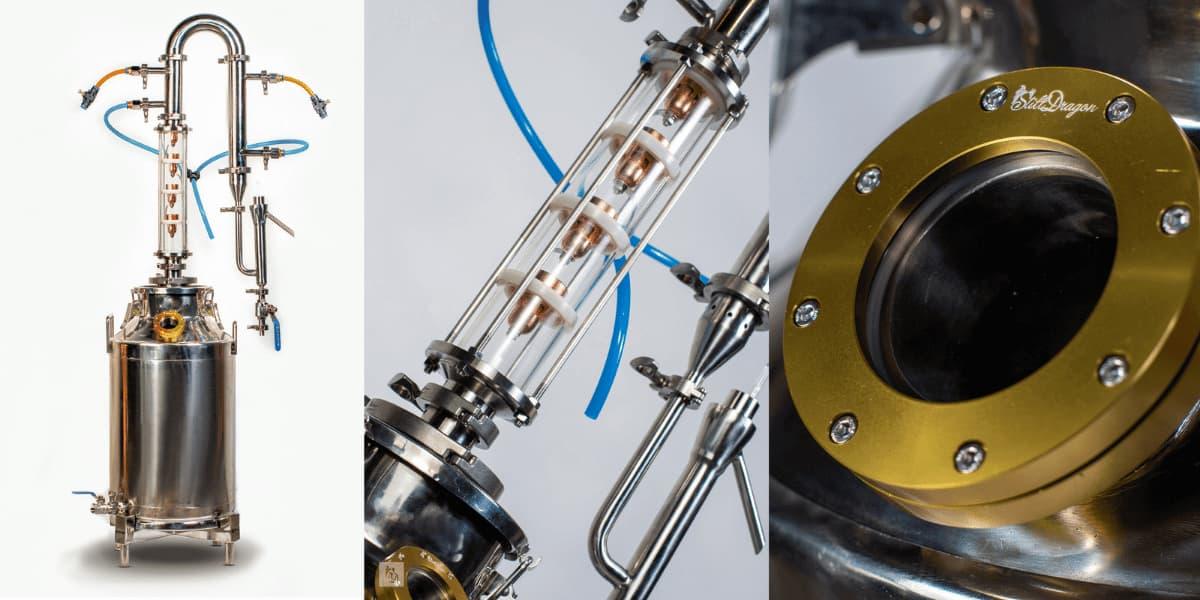
Now that we’ve gotten through some back story and theory let’s get to the fun part! The first thing you want to do is make sure you have the proper equipment. Whether you’re using a pot still or a reflux column, the right tools make the job a lot easier. You’ll also need fermentation equipment and a large stockpot to heat the sugar source. Depending on your batch size a carboy or a food-grade bucket can both work. Make sure that your fermentation vessel is sealed with an airlock during the fermentation process.

To get your fermentation started you’ll need just a few ingredients on hand. Molasses and/or raw cane sugar in a total combined ratio of 1kg to 4 or 5 Liters of water depending on the quality of the molasses being used. 10 grams of your favorite type of yeast and a teaspoon of DAP (Diammonium Phosphate) or yeast nutrient to feed the yeast. Heat the water in the stockpot and add in your molasses and/or sugar to dissolve. Make sure that your water is hot but not boiling, around 120F or 49C should be fine. We don’t want it to be too hot because it needs to be around 80F or 26C to pitch the yeast and get your fermentation started.

The temperature will vary based on the kind of yeast you use so make sure you check the instructions. Once you’ve pitched the yeast you’ll want to aerate the mixture by dumping it back and forth between containers quite a few times over 5 minutes without dumping it on your floor. Once you’re done aerating, put the wash into the sealed container with the airlock to let it ferment. It should take about two weeks for fermentation to complete. Blackstrap molasses has unfermentable sugars and can still taste sweet even after fermentation is complete so tasting the wash isn’t as reliable a way to tell if fermentation is complete. Using your hydrometer is a much more consistent method and if it reads somewhere in the 10% range you should be good to go. 

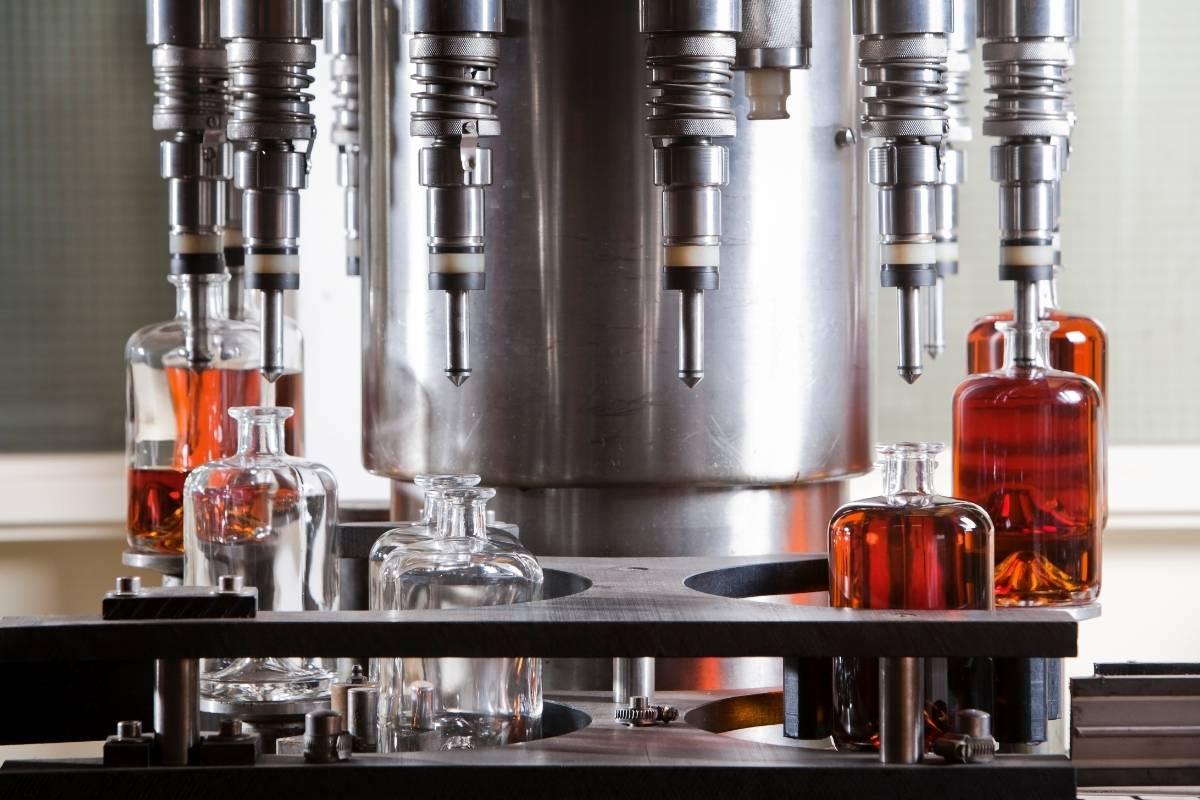
Now that your wash is ready to go you can use your preferred distillation method to distill your wash into rum. Pot stills are traditionally used but a reflux column is a wonderful piece of equipment to use, especially if you’re trying to make a lighter rum. After you’ve made your cuts be sure to let your rum rest for a long while, from a few days to a few months. Letting your spirits rest will help the flavors to mellow and if you can add spices at this point to make a spiced rum if you’d like. Let us know how this goes and comment below on what you think. If you have any questions about the process or the equipment give us a call, we’d be happy to help!

Differences in Sugar Used for Distilling

The first step to distill a good spirit is to ferment a good wash! In order to ferment your ingredients properly, you should know where your ingredients are coming from and how they react with each other. This is especially important for the sugar that is interacting with the yeast in your ferment. 

Types of Sugar: 

There are two main types of sugar: simple sugar and compound sugar. 

Simple Sugars are monosaccharides, which means they can’t be broken down to form a simpler sugar. Simple sugars are the easiest for yeast to consume because they are 100% fermentable.

  • Fructose, or Fruit Sugar, is found to be the sweetest part of sugars and is a simple sugar that can be found in honey, fruit, and many root vegetables. Fructose tends to create a sweet flavor.
  • Glucose, or Corn Sugar, is known to be the less sweet part of sugar and is another simple sugar that is often processed from a variety of starches- potatoes, corn, wheat.

Compound Sugars are disaccharides, which means that it is composed of two simple sugars bonded together. Yeast must first break down the bond between the sugar molecules, which can lead to a less efficient fermentation process.

  • Sucrose, also known as table sugar, is a compound of glucose and fructose, mainly found in sugar cane stems or sugar beetroots.

Examples of Sucrose:

As mentioned, sucrose is a compound of sugars that can be found in sugar cane stems and sugar beets, but it has many different names, here are just a few examples:

  • White sugar is a result of the extraction of sugar cane and sugar beets. After collecting sugar cane or sugar beets, the juice from the plants will be boiled down to remove moisture and crystallize the sugar. White sugar itself has some varieties: coarse grain, granulated sugar, caster sugar (in other words, superfine sugar), confectioner’s sugar (Powdered sugar), and lump sugar (Sugar cubes). Each variety has its own different use in baking, cooking, or distilling. 
  • Brown sugar is also sucrose sugar. Due to the presence of molasses, the sugar contains a distinctive brown color, which is between 3.5% for light brown sugar to 6.5% for dark brown sugar. Also, brown sugar is a minimally unrefined or partially refined form of sugar and can be collected from the first crystallization process of sugar cane. Therefore, brown sugar normally contains a higher content of minerals than other types of processed sugar. 

Why is This Important?

Sugar is one of the main components in fermenting, it reacts with the yeast to create ethyl alcohol which will later be distilled. Knowing which type of sugar is interacting with the yeast, and how it reacts, allows you to modify your fermentation process to achieve the desired results. 

If you’re just starting out fermenting and distilling, the simplest wash to start with is a sugar wash because it is simply a mixture of a simple sugar and yeast. To make sugar wash and depending on what type of spirit you want to make, add a certain amount of sugar into hot water and let it dissolve. Once it’s dissolved and cooled, we add water and yeast into the mixture of liquid. 

However, if you are a little more skilled in the fermenting and distilling process, you might want to try getting your sugars from natural sources such as fruits and grains. For instance, good whiskey is fermented with sugars that come from the barley, corn, rye, and/or wheat mixed with water and yeast. Whereas rum gets its natural sugars from fermented sugarcane.

As you are building your spirit recipe, don’t forget to take into account the basic differences in the sugar! Now that you know the basic sugars used in fermentation, learn more about yeast for fermentation.

United States Postal Service Shipping Equity Act

We seem to have become big fans of advocacy and policy change around here and for good reason. There has been a lot of movement in governing bodies to make changes to combat the massive upheavals of the past two years and many alcohol laws are relatively unchanged since prohibition was repealed. The one we’re going to focus on today has actually been in place since before prohibition became the law of the land and it has somehow survived to this day.

Background on Alcohol Shipping Laws in America

The federal ban on shipping alcohol through federally funded services has been in place since 1909, 11 years before prohibition was passed and 24 years before it was repealed. The law prohibits “The Mails” from shipping alcohol and since then no federally funded mail carrier has been allowed to ship your favorite spirits, wine, or beer. The United States Postal Service (USPS) as we know it today was founded in 1971 and has had to deal with this restriction ever since, even while competing carriers can ship alcohol.

This simple change could help USPS become more competitive and gain a share of the Alcohol E-commerce industry which was valued at $24B in 2020. The Congressional Budget Office estimates the change would bring in an additional $50M per year but that’s a small portion of USPS budget shortfall of $9.2B in 2020 alone. Still, every little bit helps and there are two bills that would repeal the ban and allow alcohol to be shipped by the USPS. H.R. 3287 submitted by Rep. Jackie Speier was first introduced in 2013 and has been resubmitted every two years after. S. 1663 submitted by Sen. Jeff Merkley is new senate legislation introduced this year. Both bills are awaiting a vote in their respective committees right now.

See Changes in Alcohol Shipping Laws By Taking Action

Nothing changes without action and if you’d like to see this restriction lifted there are a few things you can do. The most direct action is to write to your congressperson here to let them know you’d like them to support the bill(s). After that be sure to spread the message and let people know what’s going on. Talk to your friends, share this blog post, and let people who aren’t in the industry know what’s going on. This is something that has the potential to impact anyone of the drinking age so it’s not just an industry issue.

Something to Think About: Where are Your Outlets and Hookups?

We’ve previously written blogs on facility requirements and receiving your still but there’s a crucial step in between these two parts of the process. Once you’ve found a facility that has the power, space, and utilities that you need to run your equipment you’ll likely need to remodel or renovate some parts of the facility to really get it ready for your equipment and maybe a tasting room. The utility hookups can be pretty easy to overlook when you’re trying to deal with everything that comes with starting a brick and mortar business but they can be the difference between a smoothly running facility and a setup that works “well enough”.  

The first thing you’ll want to think about once you’ve selected your space is where you’d like to put your still and tanks. It’s much less of a hassle and likely less expensive to add in a hose barb or an electrical connection while your space is relatively empty than it is to retrofit a space you’ve been producing for months. Installation costs may not be much different (depending on how much needs to be moved or ripped out) but the lost production time and disruption to your operation add up quickly. Hopefully, the following things to think about will help you optimize your space and get it ready to install your equipment. It is by no means an exhaustive list of everything you could possibly need so reach out or comment below with any specific concerns you have. 

One of the first things to think about is where the still fits in your space. If you followed the advice in previous blogs you know that your equipment will fit into your facility but where it fits is also important. If you don’t have uniform ceiling height and the only place your facility is tall enough to accommodate your new vodka column is right in front of the main loading area it will likely cause you some headaches. While that’s a pretty obvious example you may have noticed in your walk-through, did you see where your utility hookups are? 

Cables and hoses are a part of most manufacturing operations but they can be awfully inconvenient if they’re not managed properly. You may or may not have a facility where head pressure or voltage drops over long runs are a huge concern but they’re worth thinking about and have a way of sneaking up on you. Everyone should be thinking about their process flow and making sure that your hoses and cables aren’t creating an unnecessary tripping hazard or blocking key lanes of traffic.

Water management is also pretty easy to overlook as well. If the floor drain is on the other side of the facility from your fermenters it can make cleaning a hassle that interferes with other parts of your operation. Stopping the rest of your production to have a cleaning day may not be the worst idea but not having the flexibility to run your other equipment while you clean out parts of your process can create unnecessary bottlenecks that can be pretty painful when you’re busy trying to keep up with the growing demand for your amazing products. It can be easy to deal with minor inconveniences when you’re getting started but those inconveniences cost you time and money, especially when you get busy. 

The Basics of Outlets and Hookups are Fundamental to Your Distilling Systems

Hopefully, this comes across as common sense to most of you and is a good reminder to be mindful of your process flow as you get into your space. Hindsight is 20/20 but with a little planning and reminding yourself that just because you *can* make something work doesn’t mean you *should* make it work you’ll avoid some mistakes and future you will thank you for it!

Lab vs Field Distilling: Do You Need the Degree?

There’s an age-old debate between getting a degree in a subject and learning through experience and attending the school of hard knocks. While knowledge and wisdom are definitely different things and there’s no substitute for experience, gaining new knowledge is never a bad thing.

How Do You Become a Distiller?

If you’re considering getting a degree anyway and you’re interested in learning how to distill, then it will be worthwhile to look at your options and see what kind(s) of programs are available to you. This can be a great way to get started and to have more exposure to the science and process you’re going to be working with. Having a solid background can give you a leg up by helping you get some experience before you jump into the deep end. For those of us who are past the stage in life where getting a four-year degree makes sense, there are several certifications or after-hours options. 

Do You Need a Distilling Degree?

Before you enroll in any program, though, there are a few questions that you should consider. First, what is your main focus? What are your strengths and weaknesses? You may be excellent at running the equipment, but you need help on the fermentation side to get the flavors you’re looking for to really pop. We all have strengths and weaknesses, and knowing where you need help is the first step to improvement. Even if you think you’re fairly solid in a particular subject, it may be good to take an advanced class or even review the basics so that the subject stays fresh in your mind.

If you’re doing distilling as a profession, the amount of skills you need grows exponentially since you’re not just distilling; you’re running a business. Distilling is a lot of fun, second only to drinking your product, but if you’re spending all your time perfecting the product and the process, who’s going to sell your spirits? Who’s going to design your logo and put together your marketing plan? There’s more to owning a distillery than just distilling, you’re starting a business, and that’s not an easy thing to do. Some things may even make sense to outsource or hire someone else to take on. It’s difficult to do it all by yourself, and many hands usually make for light work.

Whatever stage of life you’re in, there’s always something that we can learn to do things better. Whether you’re just getting started or you’re an old pro, if you’re not learning and growing, you can’t improve your craft. We’re not certified instructors, but we have seen a lot in the years we’ve spent in this industry, so give us a call if you have any crazy ideas or want to know how the equipment works.

The Difference Between Beer and Wine Production

Though there are similarities between wine and beer production, there are also some differences. The first and most obvious difference is that beer is made with grains, and by extension, whiskey is therefore made with grains. Wine is made with fruit. Therefore, Brandy is made with fruit.

The most common denominator here is that either beer or wine requires the introduction of yeast in order to convert any available sugars in the crushed fruit or converted grains. Yeast is a single-cell organism found in nature. Many yeast strains can be found in fruit trees and other forms of crops that are harvested. Yeast eats sugars and starches for energy and in turn, expel CO2 and alcohol.

A great example of this in nature that many of you may have seen is an old wildlife documentary that shows wild animals consuming Marula fruit that has fallen off the trees and naturally fermented to produce some alcohol from the sugar contained within the Marula fruit. Well, the animals quickly became intoxicated, and their resulting behavior was hilarious (and all too familiar)! If you have never seen it, just Google “elephants get drunk”. It is a great laugh and also a great example of how alcohol is naturally produced in the wilds of nature.

Details About the Fermentation of Beer and Wine

So, at the basic level beer and wine production are essentially the same.

The differences between the two are that the pressed juice from the fruit has sugars (sucrose and fructose) that are immediately available for fermentation. So much so that winemakers often add sulfur dioxide in order to minimize the competitive environment and the risk that unwanted bacteria can take over and contaminate the wine. This process helps ensure a preferable flavor profile with consistent results.

With beer production, the grains must be milled in order to expose an optimal amount of starchy surface area, then go through a cooking process in order to convert the starches contained within the grains into sugars that the yeast can eat. Once the wort (unfermented beer) has been prepared, the mixture is then boiled to ensure any unwanted bacteria has been neutralized. Again, this ensures a preferable flavor profile with consistent results.

There are other differences between beer and wine production that are far more nuanced and have much more to do with the vintner or the brewer making an attempt at crafting a finished product that has an atypical flavor profile. Classic examples that come to mind are the popular “sour” beers, whereby the brewer intentionally infects the wort with a specific organism in order to impart additional complexity to the finished product. On the wine side, the “rancio” style wines come to mind. This is a technique where the vintner ages the wine in order to actually promote oxidation.

In both of these (beer and wine) examples, either of these nuanced techniques could be considered as promoting an actual flaw in the finished product. It is the skill and creativity of the vintner and the brewer that helps create these outlier beverages that can sometimes be lesser known to the larger wine and beer drinking cross-section of the population but are thoroughly enjoyed by consumers that want more layers, or more complexity in their beer or wine.

Beer vs Wine Production

Ultimately, the baseline difference is that beer is made from grains, and wine is made from fruit. The only caveat to that terminology is that rum/rhum being a product of sugar cane is often referred to as rum/rhum beer prior to distillation.

But that is another topic for a different discussion that we will get to soon enough.

August 2021 Distilling News: Florida Changes it’s Tasting Room Laws

On July 1st there were some very significant changes made to regulations governing craft distilleries in Florida. SB 46, aka the Craft Distilleries Act, will likely have a significant impact on the way most distilleries in the state operate, anyone involved in this industry should be aware of the changes. Before we dive into the particulars, it’s important to know that we are not lawyers and this is not intended to be legal advice. Please double-check everything outlined in this article with your legal counsel and/or local authorities to make sure you are in compliance.

Cocktails Now Allowed In Florida Distillery Tasting Rooms

One of the most exciting changes made by SB 46 is the change to the tasting room laws. Cocktails are now allowed in distillery tasting rooms! Distillers had previously been allowed to provide their spirits for tastings but now they can offer mixed drinks and cocktails to make their spirits more approachable for a wider audience. In addition to allowing sales of cocktails in the tasting room, the new law allows distilleries to apply for permits to sell spirits at “Florida fairs, trade shows, farmers markets, expositions, and festivals.” This could also be a great excuse for breweries with existing taprooms to get started distilling spirits to be able to serve craft cocktails or their own house-made boilermakers.

The limits on how much a distillery can produce and be considered craft have changed as well. Limits on how much a distillery can sell and still be considered craft have been raised from 75,000 gallons to 250,000, however, a distillery will only be able to sell 75,000 gallons from their tasting rooms or gift shops. There is also a minimum requirement that each craft distillery must produce at least 50,000 gallons of branded products, “by distilling, rectifying, or blending by the craft distillery on its licensed premises” each calendar year.

Another major change is that Florida distilleries can qualify as craft distilleries under the new law even if they are not distilling their spirits on-site. In order to qualify under the craft designation, the distillery must be distilling, rectifying, or blending their spirits on-site. This allows a wider range of producers to operate under a craft designation.

Distilleries will also have to keep records of all alcoholic beverages received within or outside of Florida for three years. Those records will likely be important since distilleries will be required to have 60% of all branded final products produced in Florida by July 1st, 2026, and have at least one Florida agricultural product(s) used when making the product. “Agricultural product” is not defined directly in the law so there will likely be some clarification or challenge to this aspect at some point in the future.

These are the major changes that stood out to us but there are several aspects of the bill that may have effects we’re not going to recognize until the bill has been around for a while. Overall this bill is a wonderful chance to the regulations in the craft spirits industry in the state of Florida and will hopefully be a big help to the entire industry after all the challenges in the past year. If you’d like to learn more about getting into the craft distilling industry or expanding your current operation give us a call at 561-845-8009 and we’d be happy to help!

EPDM vs Silicone Gaskets

We’ve previously discussed some of the differences between different types of gaskets and today we’re going to drill down into some more specific pros and cons for our two most popular gasket types, silicone, and EPDM. There are several types of silicone and EPDM products out there and what we’re going to cover are the food-grade versions of both products. We won’t get into the hardcore chemistry of what makes up each of these products but we will look at various properties and how they impact the distillation process.

Distilling Gaskets Comparisons

Alcohol stills are a fairly demanding environment, any material used to make them will have to come into contact with whatever chemicals are present in your wash along with the heat and slight pressure that comes from boiling said wash. Thankfully both silicone and EPDM  are fairly chemically resistant and heat resistant, silicone can handle temperatures up to 550 degrees Fahrenheit while EPDM can “only” tolerate up to 300 degrees Fahrenheit. You still should never get anywhere close to either max temperature so both remain viable options. 

Both EPDM and silicone share a weakness, they are prone to oil and hydrocarbon absorption and can swell or have a lower service life for certain applications. This may sound like a dealbreaker for ethanol production since ethanol is a carbon-based molecule but it’s not a huge concern in this application. Ethanol behaves differently than oils and both silicone and EPDM can be safely used in its production. 

Most flexible materials will degrade over time when exposed to heating and cooling cycles so replacing your gaskets should be part of your preventative maintenance schedule. Whenever you take your still apart for cleaning you should be inspecting your gaskets and replacing any that look worn. It’s always very frustrating when your production schedule gets thrown off because you didn’t replace an inexpensive part when you’re already shut down. 

One of the main differences between the two materials is that EPDM gaskets are more resistant to abrasion and wear than silicone and can be used in more dynamic applications. This makes EPDM a clear winner for valve seals or any other application where the seal is contacting a moving part.

Choosing Your Distilling Gaskets

So there you have it, those are the main differences between EPDM and silicone in the world of distilling. Both of them have many other wonderful properties but they don’t impact the distillation process. Being UV resistant is wonderful but most of us aren’t storing our equipment outside and while a walkabout in the woods with your still is a traditional way to make moonshine the TTB tends to frown on that these days.  There’s a lot more to discuss with gaskets and all things distilling so give us a call at (561) 903-4689 or contact us with any questions you have and we’d be happy to point you in the right direction. Browse our available distilling gasket products.

How To Build Your First Still

When you first dip your toe into the craft spirits industry, there are few things you need to know about before diving in headfirst. It requires not only the understanding of distilling but also the knowledge of its mechanisms. Here is a figure that indicates how distilling works on the lab tabletop scale:

Distiallation Process

This is a very basic set up but it has all of the essential components that you need in a distillation system. You can also read one of our articles right here on how a distillation column works to have a better idea of the distillation process from start to finish.

With the assumption that your distillation team has the basics down for distilling the next step is acquiring the right distillation equipment. To create a still, you need 4 essential components:  a kettle, a heat source, a condenser, and a collecting vessel. That is it! That is all you need to build the simplest distillation system. Let us break it down for you to see what each item is and how methodically it functions. 

Equipment For Your Distialltion Still

  1. First, a kettle functions the same as the distilling flask in the picture above. Once fermented, the kettle will hold the ingredients you want to distill, also called “mash”. Depending upon what you want to make there are different kinds of mash, such as grains, fruits, sugar, etc., and it would give a different result too if you adjusted ingredients or the ratio of the ingredients. 
  2. Next, you’ll need a heat source to boil the contents of your kettle.  Depending on the location and size of your kettle, heat sources can be electric (a heating element), steam, water/oil in a bain-marie, or fire. In a smaller kettle such as the milk can, a 5500-watt heating element will be sufficient, whereas the illustration above uses a bunsen burner.
  3. Once the kettle is boiling you’ll need a way to turn the vapor back into a liquid. A condenser is a heat exchanger to knock down the vapor from a gaseous substance into a liquid state through cooling. A good-quality cooling system will create more surface area for more knock-down power. StillDragon offers various size condensers to create the perfect amount of knockdown for the distillation system.
  4. At the end of your system, you will need a collection vessel, the “Receiving Flask” in the diagram above, it’s basically any alcohol-safe container to collect your distillate as the condenser knocks it down. It could be a stainless can or a glass jar or even an empty liquor bottle.

Your First Still

Distillation Configuration Parts Key

We put all of the distillation equipment together and we are going to have something like this set up in the figure below. See how simple this setup can be to produce your distilled whiskey, gin, vodka, rum, etc? If your team has the knowledge of the distillation process, this setup can be made and get your team producing hard alcohol in the near future.

Building your first still doesn’t have to be complicated, especially if you have the right tools for the right job. At StillDragon be more than happy to guide you through designing your system and helping you get started so give us a call at 561-845-8009 or contact our team for more details. Be sure to browse our FAQs for more details as well. 

We at StillDragon are here to help! Happy distilling, guys and gals!

The Best Place For Your Boiler?

Steam boilers are often relegated to “second class seating” when it comes to distillery planning. So much emphasis is always placed on the actual still and were in the distillery to position the distillation boiler to maintain an efficient process flow as well as provide the wow factor that seems to be the hallmark of a successful distillery tour experience. Let’s face it, the still is the star of the show. However, it is all the other ancillary equipment needed that makes it happen. Remember now, the still doesn’t feed itself.

Often times the still placement for the sake of customer viewing is not all that conducive to promote efficient process flow and can further contribute to the increase of heat loss from the steam boiler that would otherwise perform more optimally in a better location within the distillery. Translation: Less than optimal location (sometimes) equals a bigger boiler. A bigger boiler equals more Benjamins.

The boiler space location to the novice distillery owner is on par with what IT trade guys commiserate over when critiquing the (“oh shoot we forgot to plan for the wiring/network closet location”) architectural plans of a new construction project.

Retrofitting a rented space can add to the challenges of optimally locating the ideal placement for the distillery’s steam boiler. In most cases, there is an existing footprint that can often foist undesirable limitations on one’s best planning efforts.

It should be no surprise that having an optimal amount of flexibility when planning out the distillery footprint is most preferable. Typically, this is best illustrated when the distillery owner has the opportunity to plan and build the distillery from scratch. The distillery owner should take into account the distillery tour experience for the tasting room customers, the process flow for the distilling team, the accessibility for the boiler contractor, as well as the requisite, ongoing maintenance over the service life of your steam boiler.

Distilling Boiler Placement

Bottom line: If you are a distiller, your boiler is the foundation of your ability to keep up with production demands. Do not plan for your boiler location as an afterthought. Keep your boiler location choice as centrally located as possible. Allow for growth. Do not undersize your steam boiler if you plan on growing. When sizing your boiler (notwithstanding sizing for growth), always add an additional margin for theoretical heat loss rather than actual, calculated heat needed for a specific piece of equipment at 100% efficiency. Your boiler contractor will advise you accordingly. Do not be dismissive of recommendations provided by your boiler contractor. They really do know their stuff!

Sincerely I say to you, I cannot emphasize enough how important it is to fully optimize your ability to apply heat to your vessels/tanks in order to process your finished product in a timely manner. Your ability to keep up with production demands as well as get to the next level of production volumes will no doubt depend upon it.

Plan well. Bounce ideas around with people smarter than yourself. Listen to your team. Do not underestimate the importance of this element of planning your distillery build.

Cheers, happy distilling, silainte.

Distilling in the News: Resolving Trade Disputes

There are positive signs that the tax and trade war that was started to counter moves in industries that have nothing to do with the spirits industry may be coming to a close. July 11th will mark the end of EU and US retaliatory tariffs on spirits for at least 5 years, possibly more if the measure is renewed. This should open US distillers to tap into demand in European markets (and vice versa) and to help struggling restaurants and bars in those countries diversify their offerings and hopefully attract clientele after a challenging year.

This saga started in 2019 when a series of rulings on subsidies for US and EU airplane manufacturers led to retaliatory tariffs. The WTO found that the EU gave illegal subsidies to Airbus and the US placed tariffs on an estimated $7.5 Billion worth of tariffs on European spirits including wine, scotch, whiskey, cognac, and various liquors. A year later when the WTO found the US’s subsidies to Boeing were also illegal the EU placed an estimated $4 Billion in tariffs on US rum, brandy, and vodka. In both cases, the increase amounted to a 25% tariff on each of these products.

Resolving Trade Disputes

American Whiskey is still being taxed as part of a separate dispute on steel and aluminum, however, the rate is maintained at 25% instead of being increased to 50% as previously planned. The deferment of the tariff increase is a step in the right direction but it doesn’t solve the underlying issue. Whiskey exports from the US have dropped almost 30% since the trade war started and maintaining the status quo will not undo the damage to the industry.

These recent developments are a net positive for the US and EU spirits industries but there’s still work to be done before the damage caused by the trade disputes is fully resolved. Hopefully, success begets success in this arena and a more fair arrangement can be reached.

Distilling News: Blue Laws in the US

Liquor laws are starting to change in a big way across the US and will continue to be a hot topic in Summer 2021 Industry News. Cocktails to go and loosening of liquor sales restrictions have been enacted or are being considered in several parts of the country and there is a long-standing area of weekend liquor restrictions that seems to be changing as well. The particularly long-standing edifice of liquor restrictions we’re going to talk about today is the Blue Laws.

Blue laws are normally pretty far from being the latest distilling news, most of these laws go back to more puritanical times and can seem outdated to modern sensibilities. In spite of the antiquated and constitutional dubiousness of these laws, they are a long-standing tradition in several parts of the country and once a law is on the books it’s difficult to repeal and that is especially true for older laws.

A great example of this is that the state of Mississippi officially “ended” prohibition a few decades after the rest of the country on January 1st of 2021 by passing a law that allowed possession of alcohol in every county in the state. Previously there was no statewide legislation on the possession of alcohol and it was up to every county and/or city to determine their own policy.

The new law does not change the right of each municipal government to ban or allow the sale of alcohol, but it does make possession of alcohol legal in the state. If you’re confused by this don’t worry, we all are. Mississippi was the first state to enact prohibition laws and has a long-standing tradition of muddying the waters with regard to legally purchasing alcoholic beverages. In spite of the recent progress, Mississippi still has its blue laws on the books prohibiting alcohol sales on a Sunday statewide.

Mississippi is not the only state that still has blue laws on the books. Arkansas, Florida, New Mexico, New York, and Oklahoma either forbid Sunday sales of alcohol completely or leave it up to the county to decide the policy. Several other states have restricted hours or prohibit off-premise sales of alcohol.

Texas prohibits liquor sales on Sundays but allows other types of alcohol to be sold during specific hours. Another hot topic in summer 2021 industry news will continue to be a recent push in Texas to get their existing blue laws off the books. This has been getting a lot of attention recently and on May 20th in Austin, there was a NASCAR entrant that sported a full car “Boot The Ban” wrap to promote this effort.

At the time of the writing of this article, the distilled spirits industry in Texas adds $8.4 billion and over 85,000 jobs to the state GDP per year making it one of the biggest distilled spirits markets in the country. Mississippi on the other hand is among the smallest with a distilled spirits industry that adds less than 5,000 jobs and just over half a billion dollars to the state GDP.

The distilled spirits industry is growing across the country and as distillers increase their economic impact they gain more influence to affect the policies in their area. We can get into a chicken and egg argument here since restrictive laws generally make growth more difficult but the truth of the matter is that there is a demand for spirits and by restricting their sales you’re very likely leaving money on the table.

If you’re affected by blue laws in your area and you’d like to see them changed, get involved and make your voice heard. At the very least support your local distilleries and have a drink! (But not on Sundays where it’s still illegal)

LOOKING FOR EXPERT ADVICE?
WE’VE GOT YOU COVERED.