Converting a Beer Keg into a Keggle

Article by Bradley Newell, Photo by Chris Reading

Tips on How to Make a Beer Keg Reflux Still

Most of us enjoy a nice tipple and learning how to make your own can be a wonderful hobby to pursue. Before you get started please make sure you research your local laws regarding hobby distilling, we are not lawyers and wouldn’t dream of giving legal advice. Every country and state has different laws regarding the legality of producing your own spirits. If you live in the United States it is federally illegal to distill your own spirits, period. However, just like with marijuana laws each state has its own laws and enforcement procedures. It will be up to you to determine the law of the land where you live and make your decisions accordingly.

A great resource for general distilling knowledge is the Home Distiller Blog for all things distilling. They have a great article about building a DIY reflux still here. There’s also a ton of useful information on the site for distillers of all sizes and experience levels. There are a lot of useful tips and tricks there, and it can save you a lot of time by giving you insight into someone else’s hard-won knowledge.

Before you get started, though, it’s very important to make sure your setup is running safely. Leaky stills aren’t just inefficient they’re also dangerous. Ethanol vapors are heavier than air so there is a risk inherent in using any external heat source, especially an open flame, to heat your kettle. We recommend using an electrical heating element in a small still as it is much safer than an open flame. 

Keg to Keggle

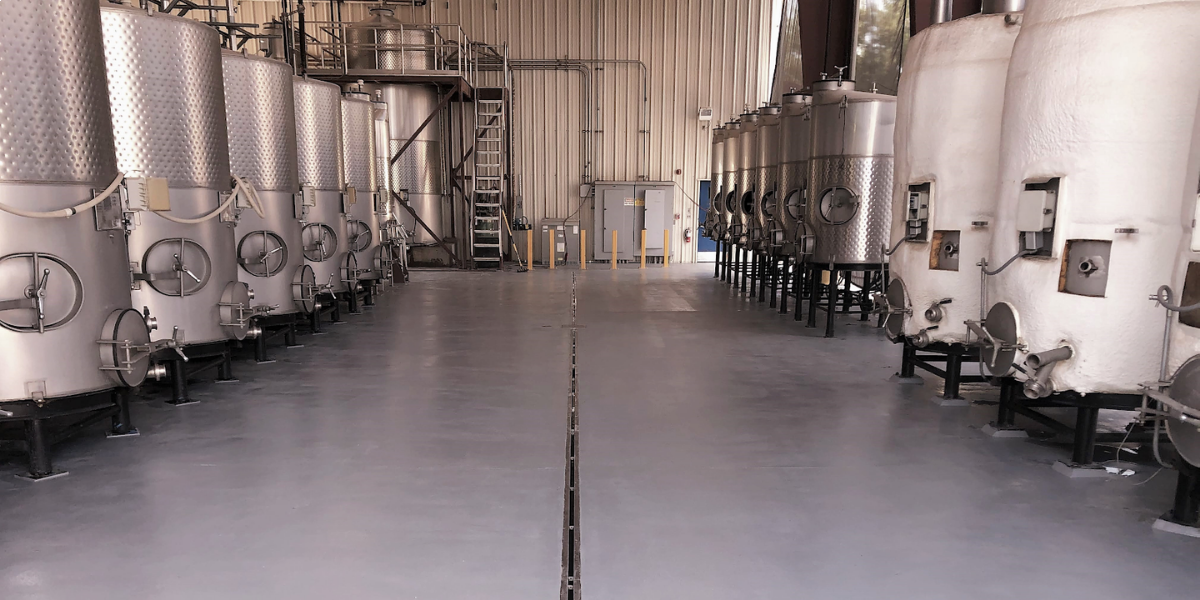
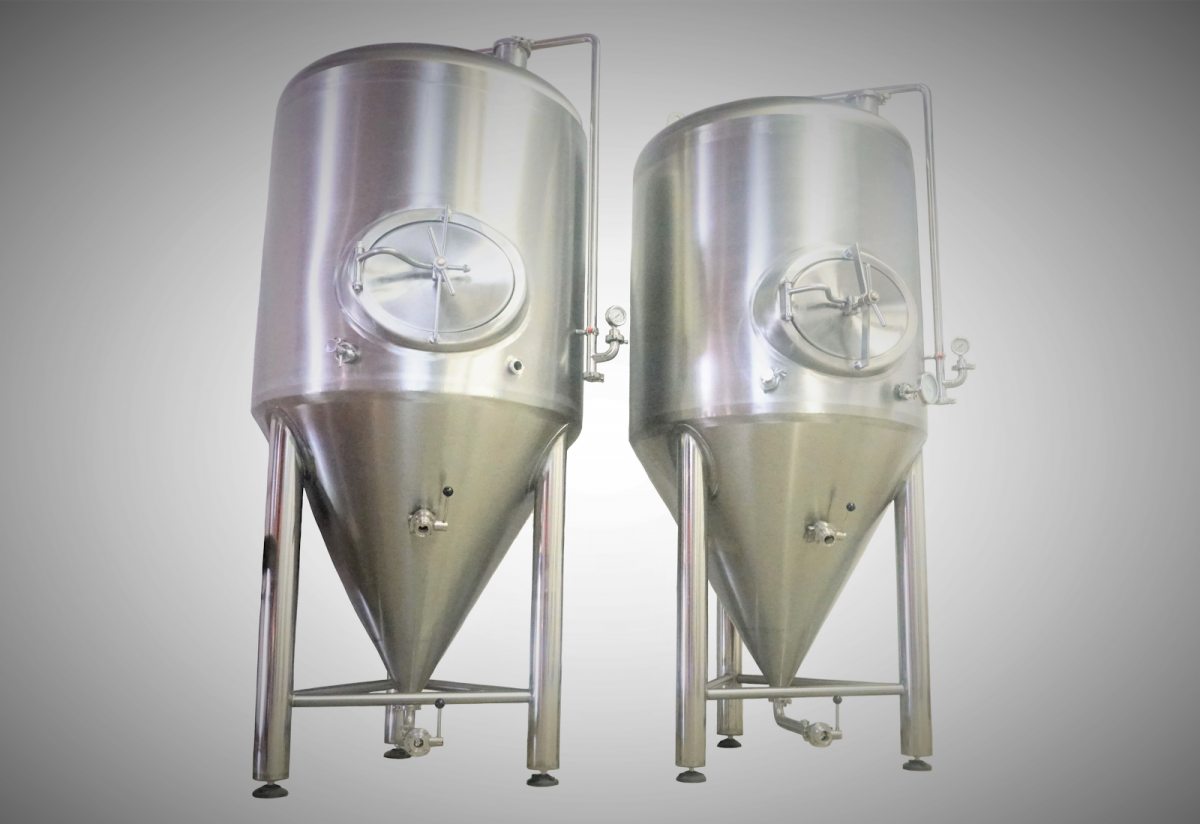
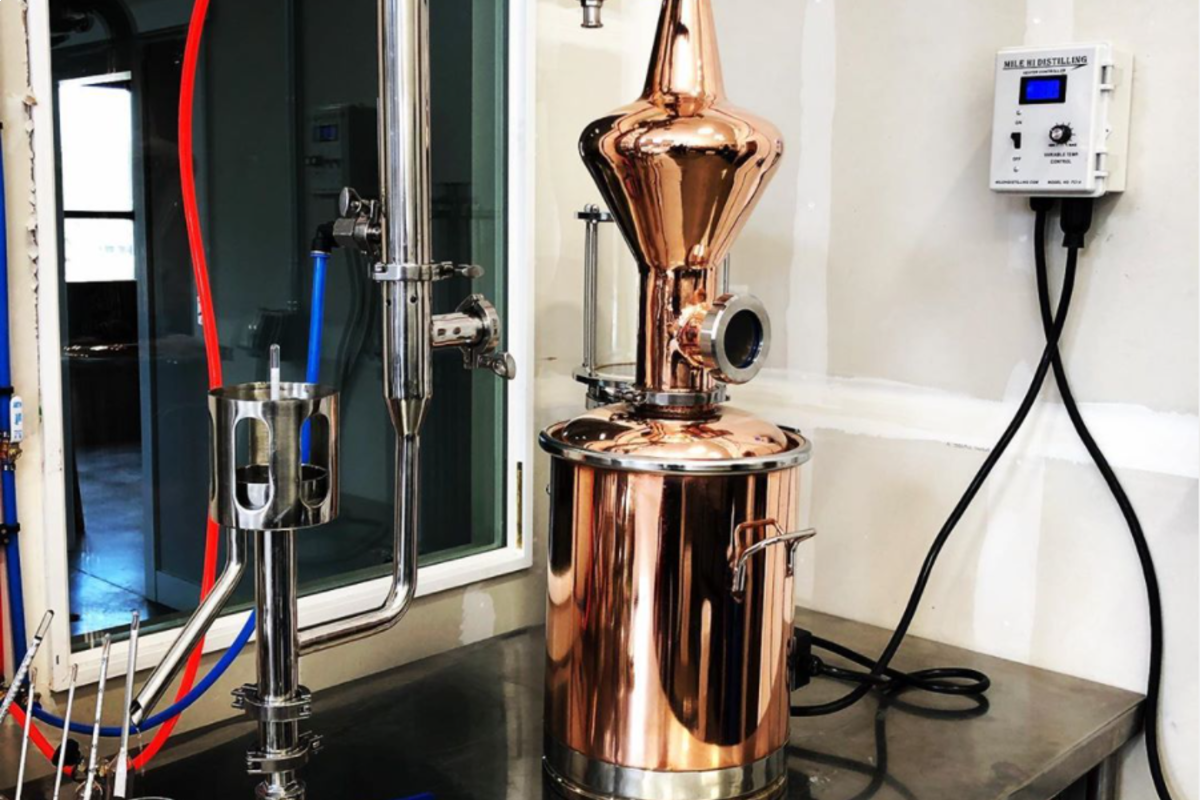
Now that we have our legal and safety disclaimers out of the way let’s talk about actually making your equipment! There are a few basic components that every still will need. You’ll have to have a kettle of some kind to boil your wash, you’ll need some amount of copper in the vapor path either in the form of a copper helmet or a column to help clean sulfur out of your spirit, and you’ll need a product condenser to turn the vapor back into a liquid. While this sounds pretty straightforward there are almost endless variations on each one of these components and they all should work together to help you distil the best possible spirit. Since there are so many possibilities we’ll start with making a still from a repurposed beer keg and home made components. If any of this sounds too complicated or you’d like to save yourself some work please check out our equipment.

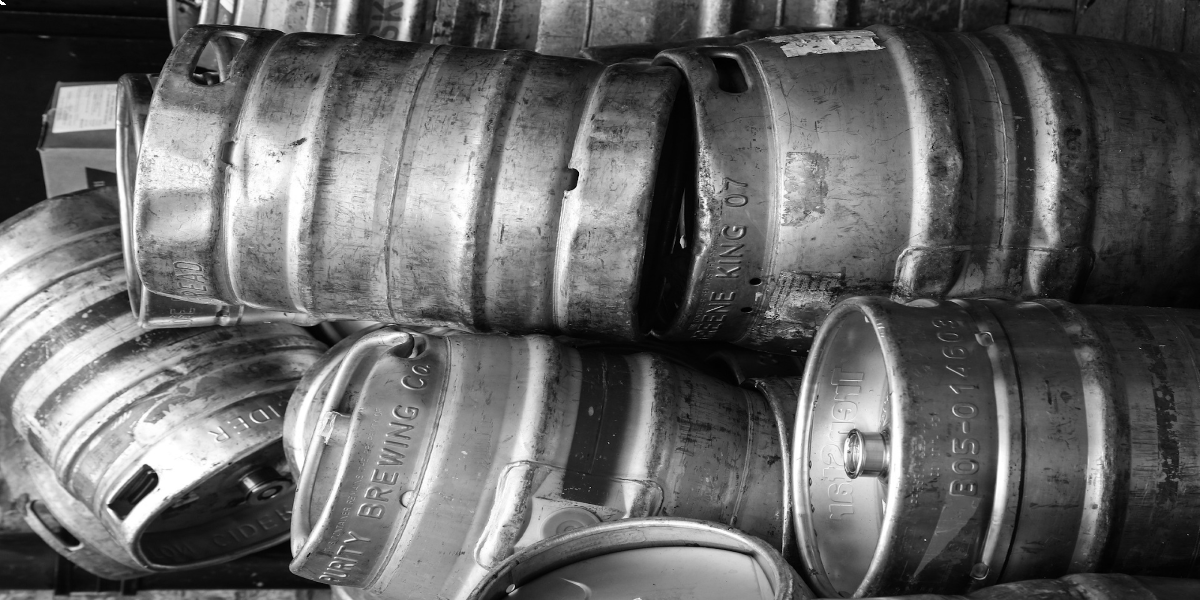
The kettle is arguably the first step in the actual process of distillation so we’ll start there. We’re converting a beer keg to a still so there are a few things to keep in mind. First is where to purchase a keg, your local bar doesn’t actually own the kegs they use so you’ll need to shop around. There are plenty of kegs out there so you shouldn’t have too much trouble finding a good deal. Once you have your keg you’ll need to cut a hole so your heating element can be fully immersed in liquid during your run. Dry firing a heating element will cause damage pretty quickly so it’s important that it stays immersed during the entire run. You may also want to cut a drainage port and put a valve on it to make cleaning easier between runs. Some other optional add-ons could be a sight glass to check your fill level and a port to fill your keg without disassembling your still between every run. While you’re getting your keg set up just like you like it make sure that the flange on the top is compatible with whatever you’re going to add next in the vapor path so that you don’t have to retrace your steps and bring your welding equipment back out again.

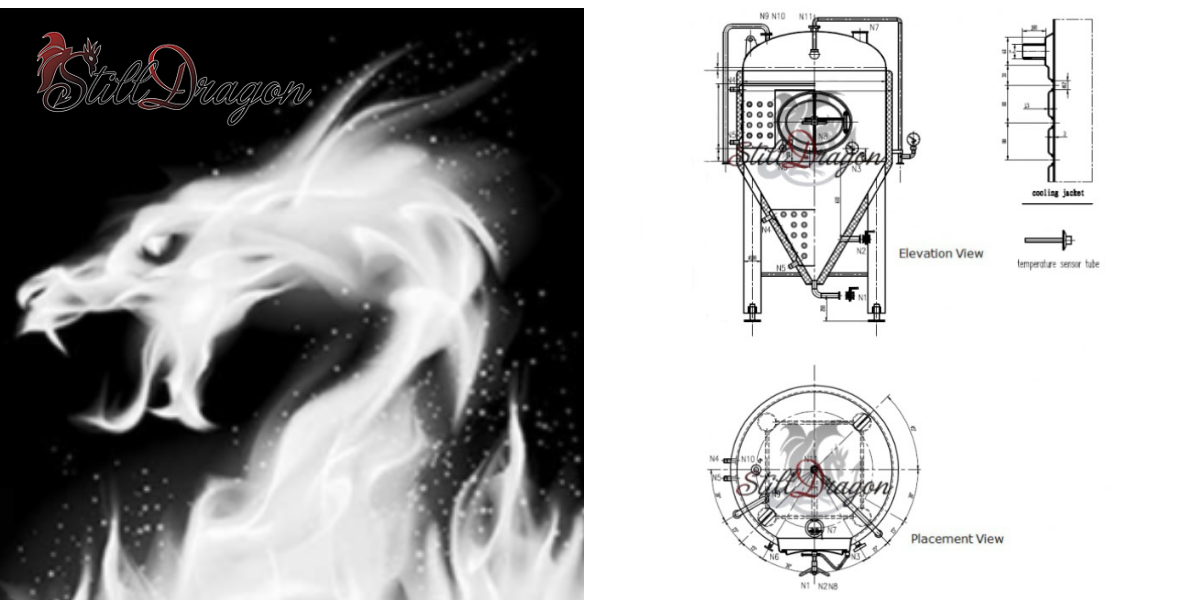
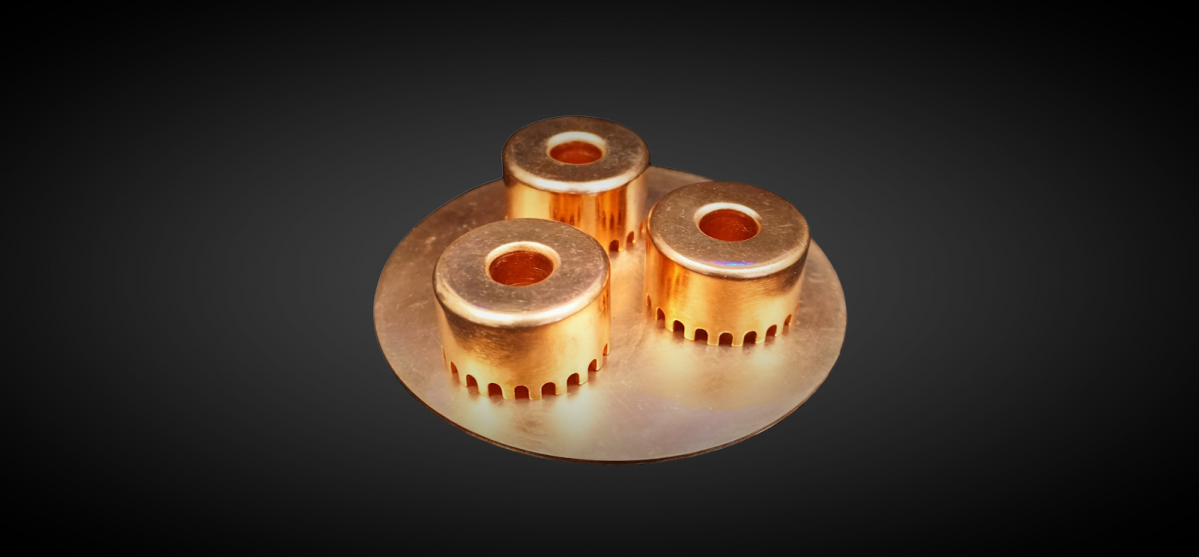
Once your keg is done we can move on to the next stage of the vapor path. If you’re adding a copper helmet to the pot still then you don’t have a ton of work at this stage, just make sure all the connections are compatible and you’re good to go. If you’re looking to add a reflux column then you’ve got some choices to make. You can purchase a column that comes with all the bells and whistles you’ll need or you can make your own. The Home Distiller Blog article referenced above talks about how to make a Boka Reflux Still, but there are other options. If you’d like to run a packed column, it can be pretty simple to add a filter disk or some other screen to make sure that the vapor can go through the packing and the packing stays where it is and doesn’t fall back into the kettle. If you’d like to try a plated column you can fabricate your own tees and plates using pipe sections and flanges. This is more work up front and is a little more complicated but it will make your still more modular so you can change configurations to make different types of spirits and it will help make it easier to disassemble and clean. Another great addition is to add sight glasses to your column so you can make sure you’re getting good reflux and flow through your run. Whatever kind of apparatus you have sitting on top of your kettle you should have some way of measuring the vapor temperature to help you get the best possible spirit on your equipment before it heads to the product condenser.

The product condenser is the last stage before your spirits can be collected and stored. There are several different types of product condensers and they all have their pluses and minuses. The traditional “worm” style condenser is the simplest to make and has served spirit makers well for generations. It consists of a copper coil immersed in a cool water bath with an open end to collect product. This is by far the simplest condenser to make for a DIY setup and is a decent place to start on your first still. If you’re feeling a little more adventurous then you can try making a Liebig condenser. A Liebig condenser is a simple shell in tube condenser that condenses the vapor in a tube inside a bigger tube that contains circulating water. This gives you more control during your run over how much cooling you can throw at the product condenser. If you’re feeling up to the challenge you can use a shotgun style condenser. This kind of condenser is like a Liebig on steroids. Instead of having a single tube there are several tubes running through the condenser. This gives you a much bigger surface area and much better condensing power in the same sized condenser. 

Whichever way you configure your kettle, column, and condenser, you’ll likely want to add a way to control how much heat you put into the kettle. It is possible to turn your heating element on full blast and let your system run however it will but this gives you zero control over the final product and it’d be similar to throwing dinner in an oven set to a random temperature and hoping it will come out ok. By having a controller on the heating element and monitoring the vapor temperature you have more control over the system and the final product that comes out of it. We have a handy DIY kit to help you control the system but you can use whatever method works for you. 

These are the basics for setting up your own keggle. They should help you get started in creating your own setup. There’s more than one way to set up these stills, and it may take some experimenting to find your perfect setup. Part of the craft of distilling is experimenting and constantly improving your process. If you have questions or need guidance on the equipment, please contact us through the website or by phone at 561-845-8009. Just don’t ask us about the legal stuff: we are definitely not lawyers!

Distillery Drainage: How to Choose the Best System for Your Facility

Guest post and photo courtesy of Slot Drain Systems

From small-batch distilleries to corporate mega-breweries, safety and sanitation are at the top of any owner/operator/manager’s priority list. They should also be top of mind when selecting your floor drainage system, but they’re not the only considerations.

You want a drain system that’s quick and easy to clean so that employees can get back to what matters most — creating excellent products for your consumers to enjoy. 

The following are many of the most frequently asked questions when it comes to choosing a brewery or distillery drainage system.

What Types of Floor Drains Are Available?

The two main drainage options for distillery/brewery environments are traditional trench drains and slot drains

Traditional trench drains comprise a wide drain channel with heavy grates covering it. Slot drains, on the other hand, do away with the grates, opting for a narrow slot opening instead. Both are effective drainage solutions for your facility, though they’re certainly not created equal.

How Do I Clean My Floor Drains?

First of all, you want to choose a drainage system made of stainless steel so that it can withstand the extreme temperatures and harsh chemicals that may be found in a distillery environment. Corrosion-resistant stainless steel will also help to reduce bacterial growth, making for an altogether safer facility from the ground up.

Trench drains are cleaned by removing the large grates, one by one, thoroughly cleaning the drainage channel with a brush and/or applicable chemicals, and then cleaning each and every grate to help minimize bacterial growth around all the edges, nooks, and crannies.

Slot drains require only a brush and/or paddle tool to clean. The scrubbing brush can be inserted through the slot opening to scrub along every part of the drain channel, and the paddle can be used to move debris along the channel toward a catch basin. This generally takes only minutes per 10-foot section. 

Slot drains made from stainless steel can also withstand all the necessary cleaning chemicals you use to keep your facility spotless. Slot Drain Systems in particular manufactures their slot drains with clean-in-place considerations, like a water line connection (Flush-Flo), which allows you to flush the channel manually or automatically using a timer.

Can I Empty My Tanks into My Floor Drains?

Provided you choose the right drainage system, you can absolutely empty your tanks into them. 

You’ll then want to choose a drain that can handle an enormous flow at once.

Trench drains are great for this because they’re wide open, allowing for a lot of liquids at once. Depending on flow rate, however, you may encounter quite a lot of splashing, so the end result may be wet floors and a lot more work when it comes time to clean up.

Common slot drain options can withstand up to 27 gallons per minute, per linear foot, which is more than enough when you need to empty a tank. The narrow slot opening helps prevent backsplash, and Slot Drain Systems even manufactures an accessory called the “Slot Hog,” which has a tri-clamp connection to help minimize the mess.

Are Floor Drains Difficult to Install?

Neither a traditional trench drain nor a slot drain is particularly difficult to install, as they must both be encased in concrete and leveled appropriately. In some cases, however, a slot drain is easier to install, since it is manufactured in longer sections, reducing the time it takes to level and connect to subsequent sections.

Do I Need to Install Catch Basins?

Though drainage systems can be made without the need for catch basins, they are always recommended, as they make the cleaning process easier and more efficient when paired with a strainer basket. 

Catch basins also catch debris and lost items that you may want to retrieve, should they fall into the drainage channel, such as rings, keys, and other small items. 

Which Type of Drainage System Is Best for My Distillery or Brewery?

The best drainage system for your distillery or brewery depends on what you want out of it and how you’d like to spend your time going forward. 

Traditional trench drain systems can be less expensive than slot drains up front, and they may seem like the easiest solution, but they come with some caveats.

First, trench drains require heavy grate covers, which are cumbersome, take time to clean, and can harbor harmful bacteria that shouldn’t be found in a beverage processing facility. 

Second, their wide drain channel opening is less than ideal for distilleries and breweries, where tanks and stills may empty large quantities at a time. Essentially, trench drains can help to create just as much of a mess as they help to prevent.

Slot drains, on the other hand, may cost somewhat more upfront, but they can actually save you time and money in the long run. The absence of heavy grates allows for a more streamlined cleaning process, and the added benefit of clean-in-place considerations helps you more thoroughly clean out the drainage channel.

It’s Up to You

Weigh the pros and cons of each system before you literally set it in stone. Do you want to save some money upfront with a traditional trench drain system? Or would you rather save it in the long run with a slot drain system?

Each system is effective in its own way, but just remember that what may seem like a luxury drainage system (slot drain) can actually be a time and money saver over the life of your facility.

> When it comes to choosing the right equipment for your distillery, the team at StillDragon is happy to answer any questions you might have. Contact us today!

Distillers vs. Bakers vs. Brewers Yeast

By Bradley Newell

Most of us know that yeast is important: it converts sugar into alcohol, and it adds flavor congeners to the ferment. It’s also the start of the alcohol production process, whether you’re making spirits, beer, or wine. If you don’t have a proper yeast fermentation, you’re not making any kind of adult beverage. But what yeast is the best yeast for distilling? There are several strains or types of yeast. They all have unique metabolisms and may need certain conditions to thrive and digest the sugars to yield different flavors. Let’s dig in.

Types of Yeast

There are many different types of yeast. Most types are varieties of a species of yeast called Saccharomyces Cerevisiae, and while they have a lot in common, they can behave very differently from one another. It can seem a little counterintuitive for one species to be so diverse, but a good analogy is to think about the different varieties of apples and how different they can be. All yeasts need similar nutrients, but some can tolerate more heat, some can convert the sugar into alcohol more quickly, and some can handle higher ABV. A major consideration is the amount of nutrients that you pitch in with the yeast and how that can affect the flavor in the ferment. Ideally, all the nutrients will be consumed by the yeast, but there are times when that doesn’t happen or the fermentation process gets stuck and you get an incomplete conversion of sugar to ethanol. This can be catastrophic for beer production, but when you’re making spirits, you have additional processing steps that may or may not remove some of the off-putting flavors. 

Yeast needs to be in its “Goldilocks zone”, where it’s not too hot or too cold for the yeast to do its thing. Too cold and the yeast goes dormant. Too hot, and they’ll be killed off. Most yeast thrives at temperatures above 65°F and below 80°F, but each variety has a different sweet spot. There are some strains of yeast that can survive outside this temperature range, but this is where most varieties are happy. Even if a yeast can technically survive in a temperature range, it doesn’t mean that it’s happy there or that it will provide you with the best flavors. Always make sure to check your supplier’s recommendations on optimal temperatures for the yeast varieties you’re using. 

Distillers Yeast: The Best Yeast for Distilling?

Most distillers yeast is selected to make a high ABV ferment in as short a time as possible. These types of yeast tend to be relatively inexpensive options, and many people claim that they’re the best yeast for distilling. Turbo yeast is a type of distillers yeast that boasts fast fermentation times and high alcohol tolerance all packaged together with a premeasured dose of nutrients. This is a great way to take a lot of the guesswork out of the equation, since everything you need is in one package. Be warned though, if your fermentation doesn’t completely consume the yeast nutrients, then it can leave some unwanted flavors behind. Distillers yeast tends to give a more neutral flavor than some other types of yeast, so it may be worth playing with different varieties to find the best fit for the flavor profile you’re looking for, if you’re looking to make more complex spirits.

Distillers Yeast vs. Bakers Yeast vs. Brewers Yeast: How to Choose

Just like all things craft, there’s more than one way to make a high-quality product. Distillers yeast isn’t the only kind of yeast out there, and different types of yeast offer different characteristics that you may want to take advantage of. Brewers yeast, or wine yeast, tends to add more flavor vs. distillers yeast, and this makes a lot of sense. Beer and wine are enjoyed without the extra separation steps that distilled spirits go through, so the yeast used needs to be able to make a good quality product without adding anything unwanted to the system. Bakers yeast is somewhat similar in that it is selected to provide flavor and not for surviving with higher ABV or fast conversion of alcohol. This means that comparing distillers yeast vs. bakers yeast (or any other kind of yeast) can present the distiller with a tough choice. The yeast selected for the flavor it adds generally doesn’t create as high an ABV, but the higher ABV yeasts can be very neutral or even off-putting in flavor. 

Ultimately, it’s up to the artist to select a color scheme and the distiller to select a preferred variety of yeast. There are pluses and minuses to each type of yeast, so the best yeast for distilling is really the one that works the best for you and your process. Distillers yeast may be perfect for a neutral spirit like vodka, while other kinds of yeast may be better for brandy or whiskey. Whether you prefer distillers yeast vs. bakers yeast or any other variety, making the spirit that you want to make means doing your research and knowing the right conditions and nutrition needed to get the most out of your ferment. That will help you make the best possible product.

> Need help choosing the right equipment for your distillery? Contact the team at StillDragon today.

What Is a Farm Distillery and How to Equip One?

Photo by Titus Stanton

What Is A Farm Distillery?

The answer to that question is pretty straightforward: it is simply a distillery space on a farm or a distillery very close to a farm. Farming and distilling practically go hand-in-hand. Farm distillers originally came about because farmers did not want the crops that they produced to go to waste.

Let’s say you have a very plentiful potato harvest one year… and you have no idea what to do with all your extra potatoes. You certainly don’t want them to spoil. Mashing, fermenting, and then distilling them to make vodka is most definitely one of the best methods to use if you want to increase their shelf lives.

Should I Start My Very Own Distillery on My Farm?

If you’re a farmer who’s been thinking about ways to further capitalize on your crops, building your very own distillery might be one of the best routes for you to take. You certainly already have the capacity to grow and harvest ingredients for your mash, you’ll just need some equipment to get your distillery going.

In some states, farmers can sell directly from the farm or in a space nearby. If your farm is far from major cities, you may have a difficult time with sales at first, but perhaps you can work your way around this through local farmers’ markets or nearby bars. People truly want to know, see, and understand where their foods and drinks come from. It’s a wonderful thing that you’ll be able to show that to them. It gives people a sense of comfort and control. Plenty of our customers operate farm distilleries. If they can do it, you can, too! We just highly recommend that you do some research about building requirements and distilling laws in your area before you take on this new project. You’ll want to read up on legal standings in your state as well as start looking into obtaining a Distilled Spirits Permit (DSP).

What Do I Need to Equip My Farm to Make and Sell Spirits?

Firstly, you’ll need to figure out what spirit(s) you’d like to make, depending on what you grow. If you grow corn or wheat, perhaps whiskey might be your calling. If you’re a potato farmer, I’m sure you could make some splendid vodka. If you’re a fruit farmer, maybe you’ll want to make brandies, or perhaps you grow a little bit of everything and you would like to try it all. The commercial distilling equipment you’ll need may vary depending upon the spirit(s) that you ultimately decide on. You may wish to take the pot stilling route if you’re interested in making whiskey. Maybe you’d like a tall vodka column or, heck, maybe you want a hybrid still so you can do it all.

Adding a distillery to your farm can gobble up a lot of your time. Time is money, too. Though slightly more expensive, a continuous system can cut your workday in half. If you’re interested in continuous distillation and why it can be more profitable for you in the long run, check out our blog post on the advantages of continuous distillation.

If you’re interested in diving deeper into the logistics of opening your very own distillery, you can check out this awesome PDF that goes into some pretty extensive detail.

If you have any questions, don’t hesitate to contact us for help with getting things moving along.

Why Insulate Your Column Still?

Photo by Michael Schwarzenberger

Distillation has been around for a very long time and, like most endeavors with that much history, the process can become as complicated as you want it to be. That much history leads to varying opinions on seemingly simple topics, and we’ll explore one of those in this article. Insulation is an often-overlooked option when you’re putting together a still, but it is something that you may want to consider adding to your reflux column design. Yes, you read that correctly. You may want to consider insulating a column in a reflux still.

Jacketed kettles often come with insulation, and that helps keep heat in the system and lower the overall energy input. This makes intuitive sense, as you’re throwing energy into the system to generate vapor. That energy will go wherever it can: metal is a good conductor, so the energy can escape through the kettle walls fairly easily. Single-walled kettles typically don’t come with insulation, so if you have one, it may be worth doing a cost/benefit analysis to see if your energy savings justify the expenses in a reasonable payback period. Less heat loss means less energy needed and faster heat-up times, so it can help you save valuable time and money.

When Not to Insulate Your Column Still

Insulating a column is similar in principle, but it’s done for different reasons. Plus, the type of column you’re running makes a difference. Columns that don’t have a dephlegmator will actually see a decrease in efficiency from insulation. While pot stills can achieve energy savings from insulation, columns that rely on passive reflux alone will be less efficient. This is because you need a temperature gradient to drive the passive reflux in the column.

When to Insulate Your Column Still

Insulation really shines in reflux column design when active reflux from a dephlegmator forces material back down the column. Insulating the column makes it easier to maintain equilibrium, giving a more consistent and higher quality product and helps maintain good column behavior, and aids in separation. By widening the operating range, it can also help the still run faster without sacrificing quality. Insulation also makes the still less susceptible to variations in the outside environment which further increases consistency. 

Insulating Still Parts

Ok. Enough about insulating a column in a reflux still. What about insulating the other parts of the still? This one’s a little tricky since different parts of the still work differently than the kettle and dephlegmator. The way a dephlegmator works is by cooling the rising vapor and putting the less volatile components back into a liquid phase. Because the heat transfer is mostly happening inside the system adding insulation could be a two edged sword. If you’re running the cooling liquid through slowly, and the dephlegmaor is hot to the touch, then insulation hinders the cooling of the vapor phase. Insulating the lyne arm or the product condenser is not a good idea for similar reasons to the dephlegmator. You want some heat to escape off the lyne arm to help your product condenser cool the vapor to liquid more efficiently. The product condenser operates on the same principle as the dephlegmator, so it’s not a clear-cut answer.

To summarize whether you should add insulation to your reflux still design, it makes a lot of sense in the areas of your still where you’re actively heating (like the kettle) or if you’re trying to achieve equilibrium in a column with forced reflux. Non-reflux columns will see a negative return on the investment and the other parts of your still may or may not benefit from insulation.

Hopefully this information helps. If you have any questions, please feel free to give the team at StillDragon a call!

How Does a Fermenter Cooling Jacket Work?

It’s all about the yeast. Everything about the business of making alcohol always seems to point back to the yeast. After all, it is the yeast that is responsible for converting our starches into alcohol. Do you fancy venture capital investors seem to think that it is your money that is responsible for making things happen? No. It is the yeast that is in charge. And the better we appreciate their role in this business, the more alcohol they will make for us. Let’s just get that straight right out of the gate.

Ah, I do apologize, I am just reading from the list of demands that the yeast colony has provided me with. They can be temperamental, though they are usually easy to work with as long as their demands are met without resistance.

The Right Temperature: Among Yeast’s Top Demands

Each strain of yeast will have its own preferred working temperature to optimally produce the highest quality yield. For example, Saccharomyces cerevisiae (the most commonly known yeast strain) prefers a working temperature that ranges from 30° C (86° F) to 45° C (113° F). Any hotter or colder, and production rates can be inhibited. So, for the sake of maintaining optimal production times and yields, managing fermentation temperatures is key.

Notwithstanding external influences on fermentation temperatures (a.k.a. the weather), the yeast colony also produces its own heat as it consumes its diet of sugars. Quantities of beer up to about 1000L are likely safe from having to strictly manage fermentation temperatures. Anything larger, however, and the brewer/distiller risks a less than optimal yield, perhaps even provoking the yeast into producing off-putting flavors.

Fermenting in an unconditioned space can allow temperatures to drop so low during the winter months that the fermentation can stall or severely retard completion. On the other hand, allowing temps to spike during the warmer summer months can retard completion and impart off-flavors. This issue of temperature can mean that spirits produced during the winter months may very well have a completely different profile compared to spirits produced during the summer months. So, the obvious solution to help maintain uniform flavor profiles throughout the year is to keep fermentation temperatures as consistently as stable as possible.

How do we do that you ask? Glad you asked. We’ll do that with a fermentation vessel that has a cooling/heating jacket.

A Cooling Jacket on a Fermenter

The fermentation cooling jacket is an additional skin that wraps around the primary vessel. Essentially, a cooling jacket on a fermenter acts like another tank that wraps around what will become the internal wall of the fermentation vessel. There are inlet ports and outlet ports that allow for a cooling medium to be circulated through the jacket. Typically, the flow rate of the cooling medium can be used to control the temperature of the fermentation. The jacket, simply put, is a heat exchanger that transfers heat between two fluids. One fluid being our cooling medium and the other being our fermenting beer or wine.

Could we use a large immersion coil to circulate our cooling medium? Yes, but the downside would be that we could have to increase the flow rates of our cooling medium or reduce the temperature of our cooling medium to be as efficient as the much-larger surface area that the cooling jacket provides. Additionally, cleaning the cooling coil could amount to an unnecessary addition of labor-hours needed to clean and sanitize our fermentation tank. As mentioned in previous blog posts, at the end of the year (or two or three), labor hours will almost without exception cost more than the actual equipment that is specifically designed to reduce the very same labor hours. Getting the right equipment for the job makes the workplace safer, more productive, and ultimately reduces operating costs of your distillery.

Some fermenters are designed for grain in solids fermentation and others are designed in the more traditional conical shape often seen in breweries. In both designs, having the cooling jacket will help to ensure that the fermentation finishes to completion, minimizes off-flavors associated with stressed yeast, and reduces labor hours needed to clean and sanitize the vessel.

Give us a call here at the office to help you work through your fermentation challenges and get your production goals pointed in the right direction.

New Year, New Means of Production: Starting a Brewstillery

By Bradley Newell

We’re getting dangerously close to the new year and all the possibilities that come along with it. As we say goodbye to the rollercoaster of insanity that has been 2020, let’s look ahead to see what we can do to build on what we’ve learned this past year and start working toward creating a better future. Many of our customers have added distillation equipment to craft new spirits, tried their hand at distilling hand sanitizer, or maybe even looked into a new continuous distillation setup. But what about the brewers out there who have seen their brewery tours and bar revenue dry up? If you’ve already got the brewing capacity – and you’ve got the desire to innovate – now may be a great time to look at making your brewery into a combined brewery and distillery – or brewstillery. 

The Benefits of a Combined Brewery and Distillery

There are a lot of benefits to starting a distillery to combine with your brewing operation. Almost every distillery makes its own beer to distill into spirits, so a brewery has the advantage of already brewing a good bit of beer. There are some differences between the beer most distillers ferment. Distillers go for higher ABV, and taste isn’t as important since the beer isn’t the final product. That being said, there’s no reason you can’t throw any beer you have that doesn’t meet your quality standards into the kettle to turn it into an amazing spirit.

Fun fact: distillation actually got its start as a way to reuse and preserve not-quite-so-edible foods that would have otherwise be thrown out. So, repurposing unpalatable beer for distilling not only helps reduce waste, but also provides you with more products, more flexibility, and potentially a more diverse client base – especially if the tasting room laws in your area allow cocktail sales so you can cater to drinkers of all types!

Choosing Among Craft Distilling Equipment For Sale

What craft distilling equipment will you need to get started with your combined brewery and distillery? Choosing the right distilling equipment really depends on what spirit you’d like to start distilling.

  • Whiskey and/or bourbon – The audiences for both these spirits and beer seem to have a lot of overlap, making them excellent matches for beer production. Another great benefit is that you’ll have whiskey and/or bourbon barrels for aging your beer once the spirit has matured! The potential drawback to making any aged spirit is that you can’t really rush mother nature. It takes time for many spirits to mature.
  • Vodka – The exception to the aging rule is vodka. It sidesteps the aging process altogether, and you can start to see a return on investment much sooner than with an aged spirit. Plus, ready-to-drink cocktails, or RTDs, like vodka hard seltzers can be a great vertical to get into to capture a share of a different market. The only downside to making a vodka compared to a whiskey or bourbon is that vodka is typically a much more refined product with much more subtle flavor, so it takes more equipment to produce it. With whiskey and bourbon, you can pot still it or do a single pass through a few plates in a column. With vodka, you’ll need a least three to five times more plates to make a quality product. These are just some examples and if there’s enough interest we may do a future article on how to make gin and other spirits in your new brewstillery.

For either spirit, the commercial distilling equipment and components needed can be as complicated or simple as you’d like. You can have a more traditional-style pot still for whiskey, a column still to help you clean up the spirit, a hybrid still, a separate gin basket, or even a production system that can do a little bit of everything. The specifics and sizing really depend on the types and quantities of spirits you plan to make. The good news is that the team at StillDragon can help you come up with a plan and design a system to meet your needs. For tips on where to save and where to splurge, check out this blog post on finding affordable distillery equipment.

It may be a good idea to start small and dial in your recipe, or you may want to have a production-ready still that will be able to pay for itself more quickly. You’ll also want to think about what modifications you’ll need to make to your bottling lines or any new equipment you may want to add there. Navigating the TTB and getting your equipment licensed is never fun, but it should (theoretically) be easier since you’re familiar with the process. Local regulations can vary quite a bit, though, so always check on the requirements before you get too deep into the planning process. 

There is a lot that goes into combining your brewery with a distillery, but the craft of brewing and the craft of distilling both come from a place of passion and creativity. Adding on a distillery to your brewery will definitely be a lot of work, but the benefits should far outweigh the cost. Having more diverse offerings and the ability to educate your customers on fermentation, distilling, and even mixology will help create an environment in which people will want to enjoy learning something new. 

We’d love to be able to help you make that happen! Contact us for help getting started on designing the perfect brewstillery for your operation.

Let’s Talk Botanicals

There’s something magical about a well-crafted gin, not to mention a cocktail with said gin. For those of you distillers who have tasting spaces or have thought about opening up your very own tasting space, you should try to take advantage of seasonal fruits and botanicals for infusion. You can have these elements outsourced or grown on your very own land. Creating seasonal gins, tonics, liqueurs, and even bitters to sell out of your storefront or tasting room will more than likely improve your seasonal sales. Getting ready for the holidays can be a stressful time, but with the season comes endless production and marketing opportunities! There are a plethora of products to create around the holidays using festive fruits, botanicals, and spices. 

Seasonal Gin Making 

Check out our most recent blog post on starting a gin distillery and our gin basket guide for information on seasonal gin making. Once you’ve read through our blog post and guide, and you’ve become familiar with how our gin basket works, you can start to think about what gin botanicals you would like to infuse in your column. Please don’t take the guide as the only way to make gin, but simply as literature that addresses tried-and-tested techniques for you to get comfortable with. Just make sure that the gin botanicals you wish to use are FDA approved, as the TTB requires formula approval when it comes to flavoring and coloring your finished spirit. We certainly don’t want you getting into any sort of legal trouble. There are a few gins out there, like Empress, that use Butterfly pea flowers for infusion, which are not FDA approved. So sorry to our American distillers, but pea flower gin may not be in the cards for a while.

Distilling Botanicals for the Season

  • SpringFruity, floral gins are wonderful for the spring months. Some of our favorites are juniper, elderflower, and cucumber gin.
  • Summer – Again, fruity, floral gins are our recommendation for summertime. Some of our favorites are flavored with juniper, lavender, rose, and chamomile.
  • Autumn – Earthy, spicy botanicals in your gin basket can give your spirit more depth and diversity for the autumn months. Juniper paired with coriander, grains of paradise, orange and lemon peels, cardamom, angelica root, star anise, and cinnamon can provide a warm, rich, fall flavor profile.
  • Winter – Again, earthy, spicy botanicals can really elevate your gin. For winter, try juniper, cinnamon, cardamom, cloves, and anise in your seasonal gin making for a craft spirit perfect for holiday enjoyment.

As you can see, you can get super creative with different gin botanical combinations to make your spirit versatile. By using different combinations in different distillation runs, you can create not only a seasonal product, but also the perfect product to sell and enjoy year round.

Seasonal Cocktails and Cocktail Kits

The ingredients you use in the cocktails you sell in your tasting room also can completely alter the flavors and aromas that come out of your gin. For example, you can use hibiscus to give your gin notes of cranberry and citrus, along with orange or grapefruit peels to then pair with holiday flavors (like rosemary or honey) in seasonal cocktails. Alone, the hibiscus would also make for a wonderful, refreshing spring or summer gin!

Selling products to go with your gin can help elevate your sales. For instance, if you craft a Christmas gin with notes of cranberries, cinnamon, and star anise, you can also create a liqueur or tonic to pair with it. Creating holiday cocktail kits can be a great way to market your spirits in the winter season. It’s a win-win, as it gets people interested in mixology and makes for the perfect Hanukkah or Christmas gift.

Now that you’ve gotten your creative juices flowing, let the seasonal gin making fun begin!

Need help choosing the right equipment for your distillery? Contact the pros at StillDragon for assistance today. 

Distillation Columns: Packed Column vs. Trays

Let’s start this discussion by revisiting a bit of high school physics to ensure you are up to speed on distillation columns… First off, what is distillation? At its essence, it is evaporation. It is a phase change. Meaning that the liquid within the distillation kettle is brought to a boil until vapor is formed. (BTW, we see other examples of phase change when water freezes and becomes ice, a solid).

Distillation Columns 101

Once the vapor is formed in the distillation column, it will be driven toward the system’s discharge outlet by pressure within the system. This pressure is created by the generation of heat needed to boil the alcoholic solution in our kettle. This is an example of mass transfer. Therefore, we first have phase change, and then mass transfer. Ok, are we up to speed yet on distillation columns? Yes? Good.

So, if we can force the above-mentioned behavior within the distillation apparatus to repeat these processes multiple times while also provoking mass transfer, we can create multiple distillation cycles on the same constituents traversing through the distillation apparatus. Simply put, every time we create a full phase change cycle, our distilled solution becomes cleaner and the abv is boosted with each successive phase change cycle.

The modality we use to force this behavior to repeat is by using a literal tray (plate) to create a place for liquid to accumulate with each subsequent volley of mass transfer. Basically, the liquid boils, the vapor is formed, rises, gets directed onto a plate, the vapor condenses back to liquid on the plate, liquid reheats as entering vapor discharges its energy into the liquid. Then liquid re-heats till vapor is again formed, and the entire process repeats itself the next upward tray. Each tray acts like a wrung on a ladder so to speak.

Ok, so now that we have discussed that baseline information about phase change, mass transfer, and trays, we can now get into what kinds of trays are best for distilling for spirits production. There are many types of trays, but for our purposes, we’ll focus on the most common types of tray systems for distilling spirits.

The tray system with the widest operating range or “turndown ratio” really does do the best job of rendering a quality spirit as well as providing an optimal processing speed.

What Is Turndown Ratio?

A quick Google search will tell you that turndown (TD) ratio “refers to the width of the operational range of a device and is defined as the ratio of maximum capacity to minimum capacity. For example, a device with a maximum output of 10 units and a minimum output of 2 units has a turndown ratio of 5”.

There are many types of tray designs used in all manners of distillation. For spirits distillation, we will discuss the three most popular types of trays (i.e., sieve, valve, and bubble cap) and compare those against random packing material. Here is a tray comparison chart:

Sieve vs. Valve vs. Bubble Cap Trays

 Sieve TraysValve TraysBubble Cap Trays
Relative Cost1.01.22.0
Pressure DropLowestIntermediateHighest
EfficiencyLowestHighestHighest
Vapor CapacityHighestHighestLowest
Typical TD Ratio245

Operating Ranges of Structured and Random Packing Materials

In my mind, the most notable factor that favors tray use is that they can handle solids far better. Packing fouls easily. As a result, packing can be a real nuisance to clean and can become downright dangerous as seen at the Silver Trail distillery accident several years ago. Notwithstanding the potential for catastrophic fouling, cleaning a large-scale production system will also gobble up labor-hours.

The other equally important factor is the notion of maldistribution or an uneven distribution of the packing material within the column. Maldistribution contributes to enhanced sensitivity issues. In other words, it further reduces the operating range of the packing by not allowing for equal liquid and gas flow up and down the length of the column. It only takes a small bit of inconsistent loading in the packing into the column to create a problem such as channeling. Therefore, much greater care is needed when choosing and installing the packing material. Maldistribution is more problematic on the larger diameter column needed for legitimate commercial production volumes.

Packing can provide more theoretical trays and save valuable ceiling space. But with respect to more consistent still behavior and ongoing maintenance and durability, trays have the advantage.

Though many types of packing materials can be more affordable, trays provide a clear benefit within the context of distilled spirits. That’s not to say that a premium spirit can not be produced with a packed column, only that packing simply is not as user friendly as fixed trays.

> Got questions about commercial distilling equipment? We’ve got answers! Contact StillDragon today.

Is Barrel Entry Proof Really That Important?

Let me briefly go over some bourbon history for you to better understand how the concept of barrel entry proof came about. In the early 1800s, whiskey wasn’t sold by the bottle. Instead, it was sold straight from the barrel by the distiller. Customers would bring their own containers such as flasks or canteens to store the whiskey that they purchased. The proof of the whiskey varied slightly, depending on how or where these barrels were stored. Barrel entry proof was typically around 100 to 103 proof and sold around 95-105, depending on how the climate affected the barrels. After prohibition, consumers were no longer able to purchase bourbon from the barrel. Taxes and regulations on alcohol put an end to this.

Once the repeal of prohibition took place and American distillers were able to sell their whiskey again, they began to use glass bottles for storage and sales. Barrel entry proof became a more important component to the craft, and the manipulation of whiskey flavor began to vary more and more from distiller to distiller. Now that whiskey wasn’t sold straight from the barrel, distillers were able to fill their barrels with higher proof bourbon and water it down later, if need be. The legal barrel entry proof was later raised from 110 to 125 in 1962… but most distillers do not exceed 110.

How Barrel Entry Proof Affects Supply and Production Costs

When putting whiskey in barrels, the higher the proof is the fewer barrels you will need, because there is usually less product volume, allowing you to save storage space in the distillery. However, depending on the climate inside the storage area, lower proof bourbon can age much faster, depending on heat and humidity. As a result of the quicker aging process, small, start-up distilleries may want to take advantage of lower entry proof as it helps to create cash flow sooner. Either way, the production costs will vary based on what proof the whiskey is when entering the barrels, as well as the number of barrels required to meet your bottle quota. As you decide what proof to barrel at, keep three things in mind:

  1. Quicker aging process means quicker cash flow.
  2. Lower entry proof is typically deemed more palatable to a wider range of consumers.
  3. The older the whiskey, the bigger the price tag.

How Science and Climate Affect the Flavor of Barrel Aged Spirits

Artificial Heat Cycles vs. Natural Heat Cycles

Depending on the climate in which you store your casks, the proof and flavor are going to vary. Climate variations influence your whiskey’s water-to-alcohol concentration, meaning that in the cool, dryer climates, barrel proof doesn’t change too much. In warmer, more humid climates, barrel proof typically increases significantly.

Some states, such as Florida, experience relatively stable climate changes, while states like Kentucky have very hot summers and very cold winters. Craft distillers in these regions with extreme seasonal weather changes may choose to use temperature controlled warehouses, creating artificial heat cycles. This continues maturation during these chilly months so that they release their product on time. As the whiskey is warmed in the barrel, it will seep into the wood and extract color, flavors, and aromas. When cooled, whiskey flows out of the wood with all of those new elements (we’ll go into this further in the section below).

Extraction, Esterification, Transesterification, Oxidation/Evaporation, and Filtration

There are 5 significant chemical processes that occur during barrel aging:

1. Extraction

Extraction is the absorption of wood sugars from the barrel. Oak casks react depending on the alcohol-to-water ratio. Meaning that, with more water in the whiskey, wood sugars such as tannins and vanillins are dissolved faster. A higher proof allows the tannins to come across too strong, causing a harsh wood flavor and odor (something the guys here at StillDragon refer to as a “tooth-picky” finished product). Lower proof typically equates to a smoother finish.

2. Esterification

Esterification is a chemical transformation process that creates the floral and fruity notes in the distillate; by combining alcohol and carboxylic acids, a chemical compound called an ester is formed. The esters are responsible for both the floral and fruity notes, as well as some of the pungent smells. High acidity = more esters. Rum dunder and spent mash that remain in the kettle after the first distillation run are loaded with esters. Some distillers will repitch these remnants back into the kettle to be distilled with the rest of their alcohol. For whiskey, the mixture of spent mash with the first collection of distillate is often referred to as “sour mash”. These repitching techniques are often used because plenty of consumers enjoy the funky depth and diversity within these whiskies or rums.

3. Transesterification

Transesterification is a process in which newly formed esters within the barrel combine with alcohols creating a constantly evolving occurrence of ester formation. This happens at a very slow rate because a strong acid catalyst and/or heat is required to create and transform these chemical compounds at a rapid rate. This process happens more consistently in very hot, humid climates. Transesterification can, again, further the development of desirable flavors in your finished product.

4. Oxidation/Evaporation

During oxidation, ethanol will slowly evaporate. This gives:

  • Headsy alcohol (rubbing alcohol odor) —-> fruity aroma/ flavor
  • Tailsy alcohol (wet dog/ sweaty shoe odor) —> nutty aroma/ flavor
  • Tannins (wood sugars) —> vanilla aroma/ flavors

5. Filtration

Charring your barrels aids in the process of filtration. Fusel oil molecules (tails) are bigger and denser than ethanol molecules. They are caught and trapped in the charcoal layer before your spirit is absorbed into the oak, reducing the amount of tailsy odors and flavors.

Now, I am by no means saying that barrel aging will completely eradicate these flavors and odors, and you’ll be fine if your distillate is super headsy or tailsy. What I am saying is this: many distillers like to curate their own concoctions by mixing heads, hearts, and tails. If these components are tastefully added back into the hearts, it can actually create a far more desirable and diverse aged product.

(Note: If you would like to dive deeper into the chemical process of oak aging and how different factors affect activity, click here to read more. To read more on the process of esterification in regards to brewing / distillation, click here.)

There are so many different factors that play into the way your finished product tastes and feels in your mouth. When it comes to rum, whiskey, brandy, or tequila, barrel entry proof is not always the make or break. The climate and chemical processes that occur during aging can truly transform and/or enhance your spirit. These factors don’t necessarily make your spirit better or worse, they just make it different. Developing a product that you and your customers love is really what it’s all about.

> Interested in making barrel aged spirits? Give us a ring here at the office (561-903-4689) or shoot us an email at info@stilldragon.com for advice.


How Can I Legally Distill at Home?

Photo courtesy of Clear Water Distilling

At StillDragon, we get a lot of questions about the best ways to legally distill spirits at home. Home distilling is an issue that can be both confusing and straightforward at the same time. We are not lawyers by any stretch of the imagination, and we are definitely not licensed to give legal advice, so nothing in this article is intended to replace the advice of a licensed legal professional. The short answer is that distilling spirits without a license is illegal at the federal level and that supersedes any statutes in your state.

Several states have home distilling laws worded in such a way that if it were legal federally, then it would be legal there… but some states would still ban distilling spirits at home regardless of federal legality. Some local enforcement agencies turn a blind eye on small stills for personal use, since the laws were put into place primarily to ensure that taxes are collected. However, unless you have a license, you can be penalized for distilling spirits at home. Please do your own research on home distilling laws and/or seek legal counsel before distilling any spirits or even purchasing any distilling equipment, because in some states it’s illegal to even own a still.

At the federal level, things are pretty cut and dry when it comes to distilling spirits at home. The U.S. Tax and Trade Bureau‘s (TTB) website states that “while individuals of legal drinking age may produce wine or beer at home for personal or family use, federal law strictly prohibits individuals from producing distilled spirits at home (see 26 United States Code (U.S.C.) 5042(a)(2) and 5053(e)).”

In other words, beer and wine are fine to produce at home but the distillation of spirits requires a license. This seems pretty straightforward, albeit hypocritical. (If you’d like to know more about how to navigate the licensing process, we’ve got a great blog about it here.)

In addition to the federal requirements for distilling permits, each state has its own home distilling laws and some are more distiller-friendly than others.

Florida Home Distilling Laws

For example, the laws in our home state of Florida explicitly state in Title XXXIV: Alcoholic Beverages and Tobacco 561.17 that a license is required:

License and registration applications; approved person. (1) Any person, before engaging in the business of manufacturing, bottling, distributing, selling, or in any way dealing in alcoholic beverages, shall file, with the district licensing personnel of the district of the division in which the place of business for which a license is sought is located, a sworn application in the format prescribed by the division.

If you don’t have a license, any property or raw materials used in the manufacture and sale of materials for the purpose of “evading tax” by producing untaxed spirits can be confiscated. In fact, it is a felony in Florida to have one gallon or more of illegally produced spirits. Under a gallon is considered a misdemeanor by the state of Florida but the seizure of property can still be enforced. Another Florida quirk is that it’s illegal to even own a still without a license here, so you technically couldn’t even legally distill water if you wanted to.

“Legal” Moonshining

In contrast to Florida, some state’s home distilling laws allow “legal” moonshining, even though it’s considered illegal federally. Those states include Alaska, Arizona, Maine, Massachusetts, Michigan, Missouri, Ohio, and Rhode Island. Federal law does supersede state law, but since we’re not lawyers, it is up to you to research your options for distilling spirits at home. Each state really is very different. Here is a great resource to check your state’s laws regarding distilling.

Options to Distill Spirits at Home

So, if you happen to live in a place with friendlier laws and are curious about getting started (and haven’t been scared off yet!), there are a couple of options for home distillers. For those who get a license and are new to distilling or  for those who live in a state that allows home distillation of “water”, a relatively inexpensive option is to start with a milk can kettle and either a copper helmet or a small column. These are great systems to learn on since they are customizable, and you can tailor each system to your needs.

The type of equipment you choose is going to depend on what you want to make. As a general rule, plated columns will give a better separation of the different components. They will also give you a purer product than running through a copper helmet. The more plates there are in the system, the better the separation will be. This is why most systems that produce vodka have somewhere between 12 and 30 plates. 

There’s a seemingly endless debate about how much copper is the right amount on a still, and while there are a lot of advantages, the law of diminishing returns applies as well. You can create wonderful products on stills made of glass, stainless steel, or copper so it’s up to you to decide how much you’d like to budget for equipment. A good rule of thumb is that glass is cheaper than stainless steel, and stainless steel is cheaper than copper. Ultimately, whatever material you choose, make sure that you’re properly cleaning your equipment.  

Hopefully you now understand a bit more about home distilling laws and what you need to get started distilling spirits at home. If you have any questions about the equipment you’ll need, please give us a call at (561) 903-4689. If you have any questions about the laws in your area or the consequences of home distilling, please call a local lawyer, as they’ll be able to help you much more than we can!

Grains, Fruit, and Other Fermentables

Ever wonder where your favorite spirits come from? Or why certain spirits are very popular in certain areas?

Throughout the history of wine, beer, or spirits production, producers have often used what is most readily available. Early farm distilleries therefore would most often ferment surplus crops that were unable to get to the markets in a timely manner. This strategy allowed producers to create a profit center on what might otherwise become waste. Or more specifically a loss in potential net profit. As you can imagine, the shelf life of an alcoholic solution is exponentially longer than the shelf life of the original crop itself.

In Search of… Fermentable Sugars

Regional crops used to make alcohol don’t always have the most sugar, or the most starches to be converted to fermentable sugars. Crops used often simply grow best in that region and therefore can be cultivated and processed with a very good degree of dependability.

A very good, and arguably the most noteworthy example of this is wine or brandy made with grapes. And by that, I mean that of all the fruits used to make wine, grapes do not have the highest sugar (if alcohol yield mattered most?) content. And yet, alcohol made with grapes is by far the most popular fruit used to make wine and brandy. Here in the continental U.S., for example, grapes can be grown in USDA planting zones 4 through 10. Or more simply, just about everywhere. Apples grow best in zones 3 to 9 and peaches for example grow best in zones 6 and 7 as an example.

Let’s Move On to Grains for Whiskey and Beer Production 

Scientists believe that wheat was domesticated as a crop 10,000 years ago, corn was domesticated as a crop about 9000 years ago, barley was domesticated as a crop 8000 years ago. Rye dates back 1800 years (and considered a weed back in the day) and oats (also considered a weed) 2000 years. Other grains are millet, spelt, buckwheat, and of course rice. My point here is that grains have been a domesticated crop for a very long time and that it makes perfect sense that someone, somewhere has figured out after all this time how to render alcohol from converting the starches contained in grains into a fermentable modality for self-medicating.

Within each type of grain, there are varieties that do particularly well in specific growing regions and other varieties that do well in multiple regions. Many heirloom varieties of corn, for example, have ended up being forgotten as hardier, more commercially viable varieties have taken over the market space. 

So, if we fast forward to the last 10 years or so, we can see some of these old, nearly forgotten, heirloom grain varieties making a comeback as boutique distilleries experiment with their viability to make a truly craft whiskey. These small distilleries struggle and grope to create an identity and differentiate themselves from the large whiskey houses. Additionally, many new distillery owners are proud of their local history and want to preserve the local crop history as a way to educate their customer base and create enthusiasm about their product. A way to install part of the local land into each bottle. In doing so, small, craft distilleries have been able to produce some really interesting whiskies that would otherwise be completely unavailable to consumers. If this sounds familiar, it should; small breweries started this “new “ way of creating new beer choices for consumers two decades after the wine industry here in the U.S. invented itself in the looming shadow of European winemaking giants.

Finally, Onto Sugar Cane for Rum Production

Cane grows best in zones 9 and 10 because it is cold sensitive. Cane juice is nearly a perfect fermentation medium because the fermentable sugar content within the juice usually registers at about 18 or 19 Brix. As luck would have it, Saccharomyces cerevisiae (the most common yeast specimen found in the cane field) happens to thrive best with 18 or 19 Brix. Yeast and cane juice would be a processing match made in heaven were it not for the unforgiving lack of shelf life associated with fresh-pressed cane juice.

The production of each spirit poses its own set of processing challenges, and craft distilleries along with small family farms are up for the challenge to bring consumers the most versatile selection of craft spirits to date. 

If you are traveling across the country, please make a point to stop in at any number of small craft distilleries on your travel path. I promise you’ll be wowed by their creativity, as well as impressed with their friendly, warm enthusiasm for the craft.

Silainte

> Shop StillDragon.com for all your distilling equipment and supply needs.

LOOKING FOR EXPERT ADVICE?
WE’VE GOT YOU COVERED.